

How To Stretch Image On Iphone
Using great image editing apps and photoshop apps to edit photos on iPhone is central to creating a great collection of pictures. While it's important to take good photos to start with, image editing allows you to turn an ordinary photo into an amazing one. From basic adjustments to fun and creative effects, there are editing techniques to suit all kinds of photos and photographers. In this tutorial you'll learn seven iPhone photo editing tricks that will give your images the wow factor.
1. Straighten Architectural Lines

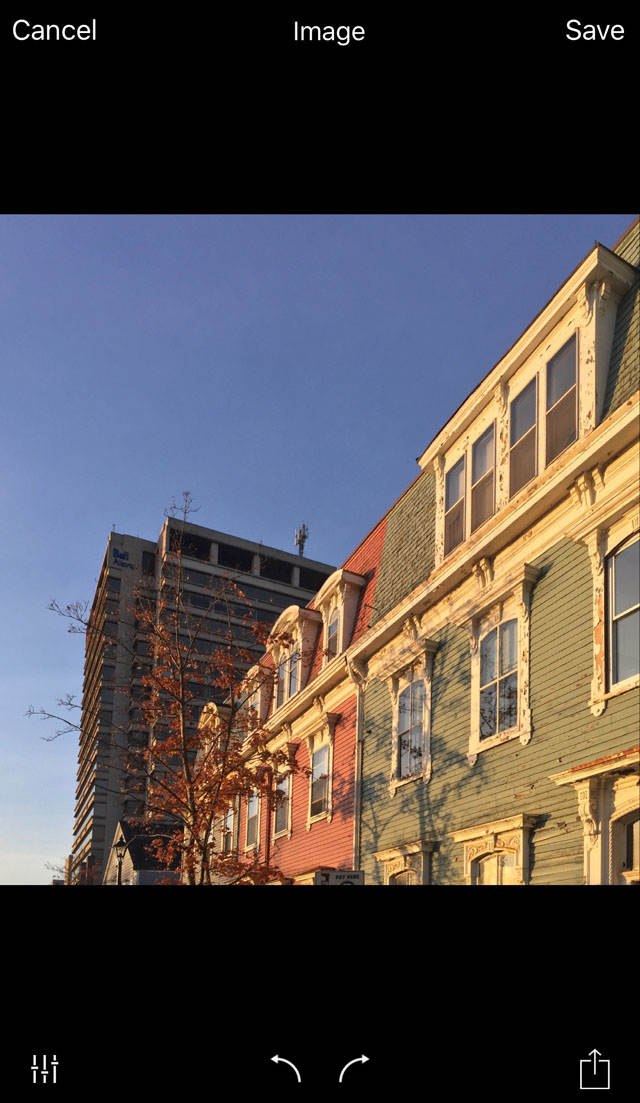
Take a look at the photo below of some classic wooden houses juxtaposed with the modern office tower.
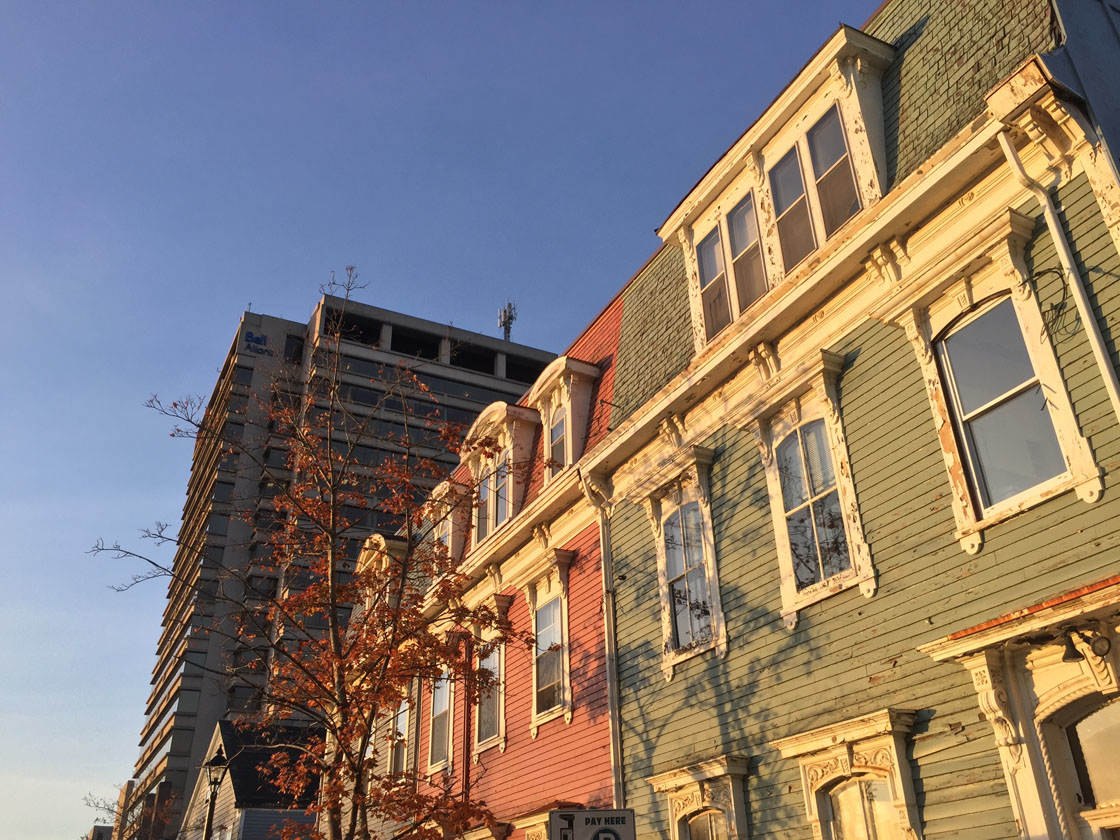
At first glance, this picture looks perfectly normal, and could be considered a "finished" photo where no further editing is required.
However, due to the angle that the photo was taken from, the vertical lines of the buildings aren't straight. Notice how they converge towards the top of the photo.
This is a common problem with architecture photography. When you shoot a building from a low angle, the tilt of your iPhone causes this issue with perspective.
There are several apps that can be used to correct perspective problems like this, including SKRWT and Snapseed, but I like to make use of a straightening app called Genius Scan.
This app is primarily for scanning and straightening office documents, but it also doubles as a photo straightener. It's easy to use and offers great control for correcting perspective distortion.
Open the Genuis Scan app, then tap the orange "squares" icon to the right of the camera icon.
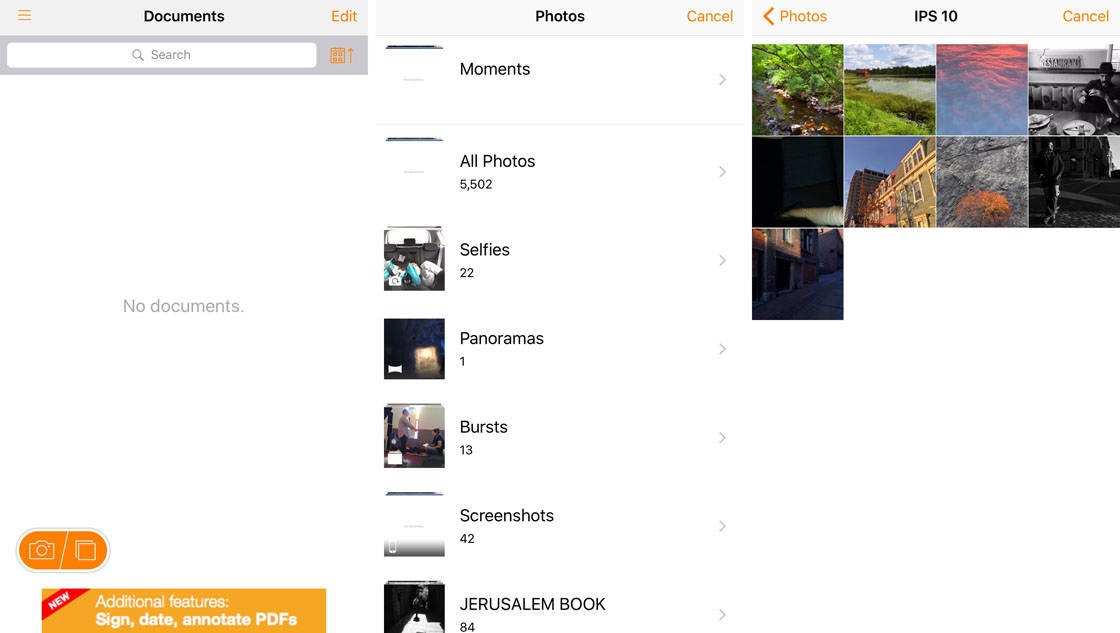
This will open up your entire iOS photos collection. Select an album, then tap the photo you want to straighten.
Your photo will open with an orange grid on top of it. These gridlines are guides that will help you judge which elements in the picture are perfectly vertical and horizontal.
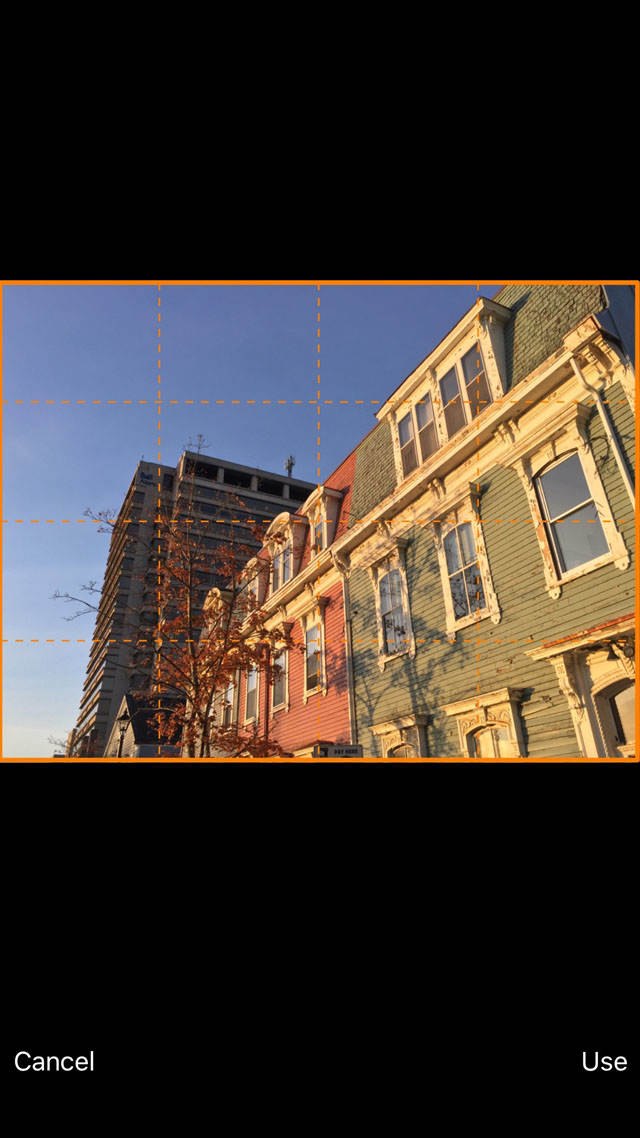
Use your finger to drag the top right corner of the photo towards the left. Keep dragging until the right-hand vertical orange line becomes parallel to the vertical features of the house.
For example, in this photo, the orange guidelines on the right side of the picture are now lined up with the vertical window frames.
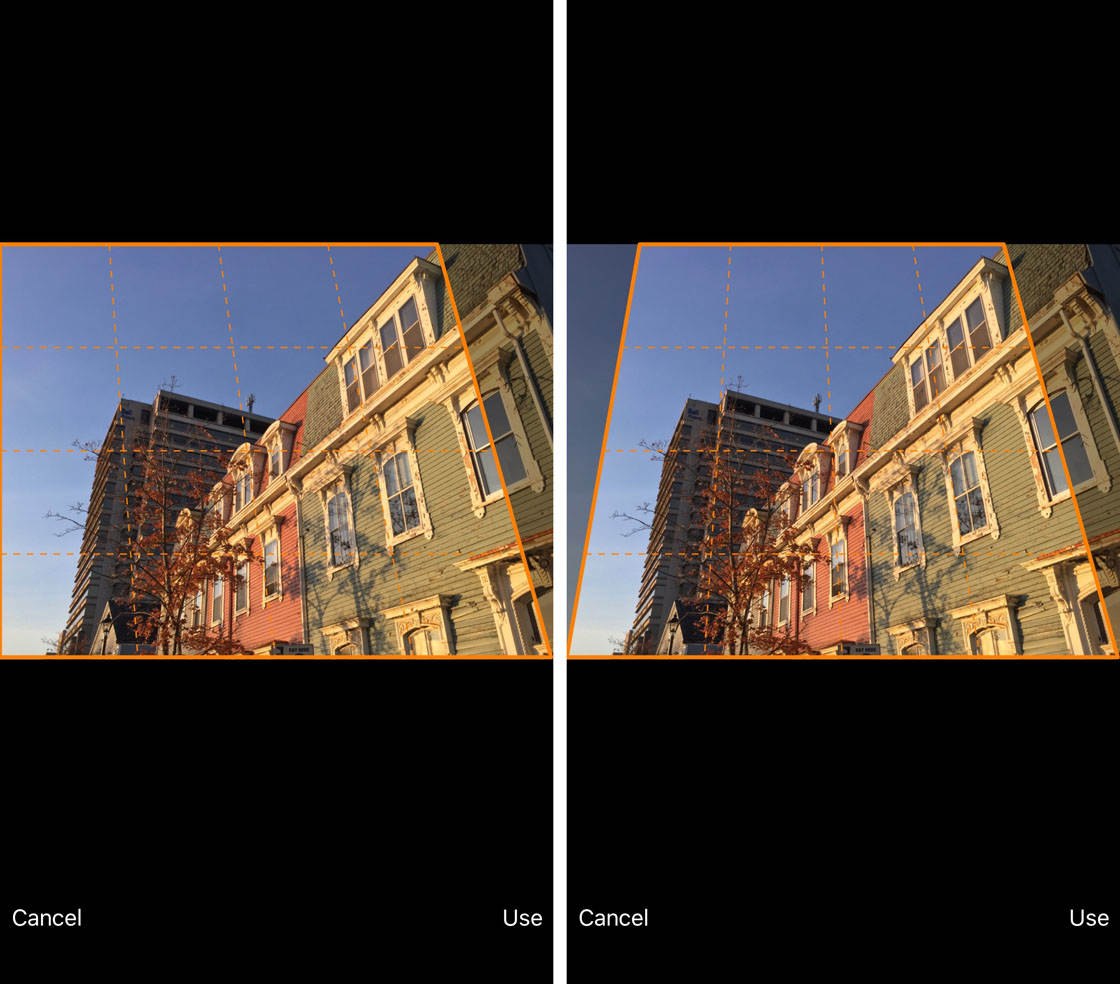
Now do the same on the left side of the photo. In this example you can see that the orange guides are roughly parallel with the vertical aspects of the office tower exterior.
When you're done, tapUse at the bottom right of the screen. The result will be an architecturally straight photograph.
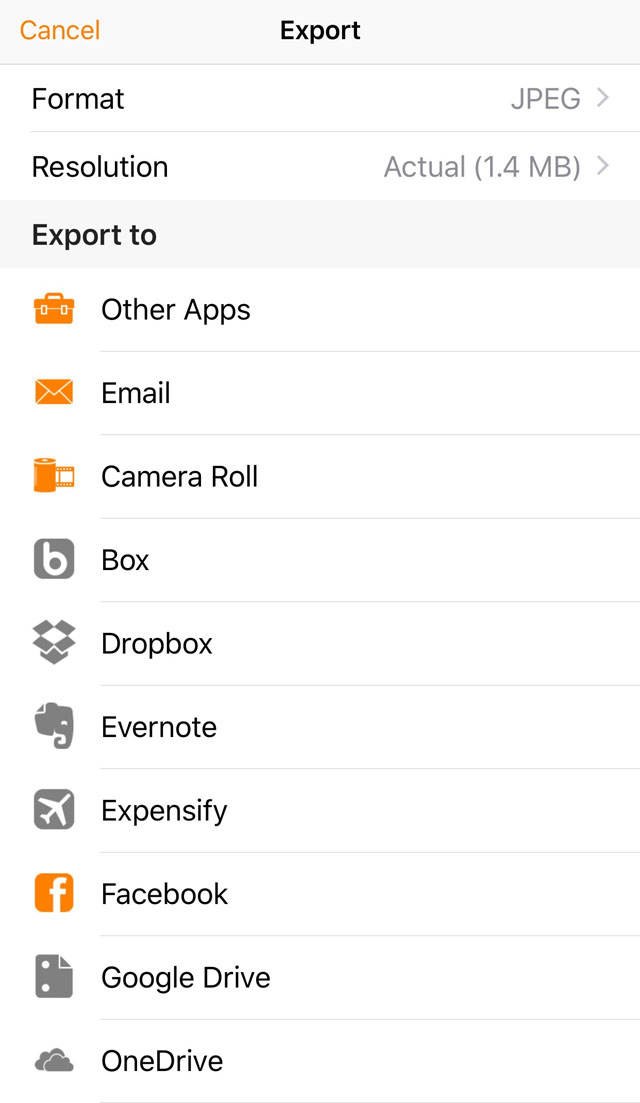
TapSave at the top right, then change the Format option from PDF to JPEG. In theExport To option, selectCamera Roll to save the image to your photo library.
Below is the edited photo with the vertical lines straightened.
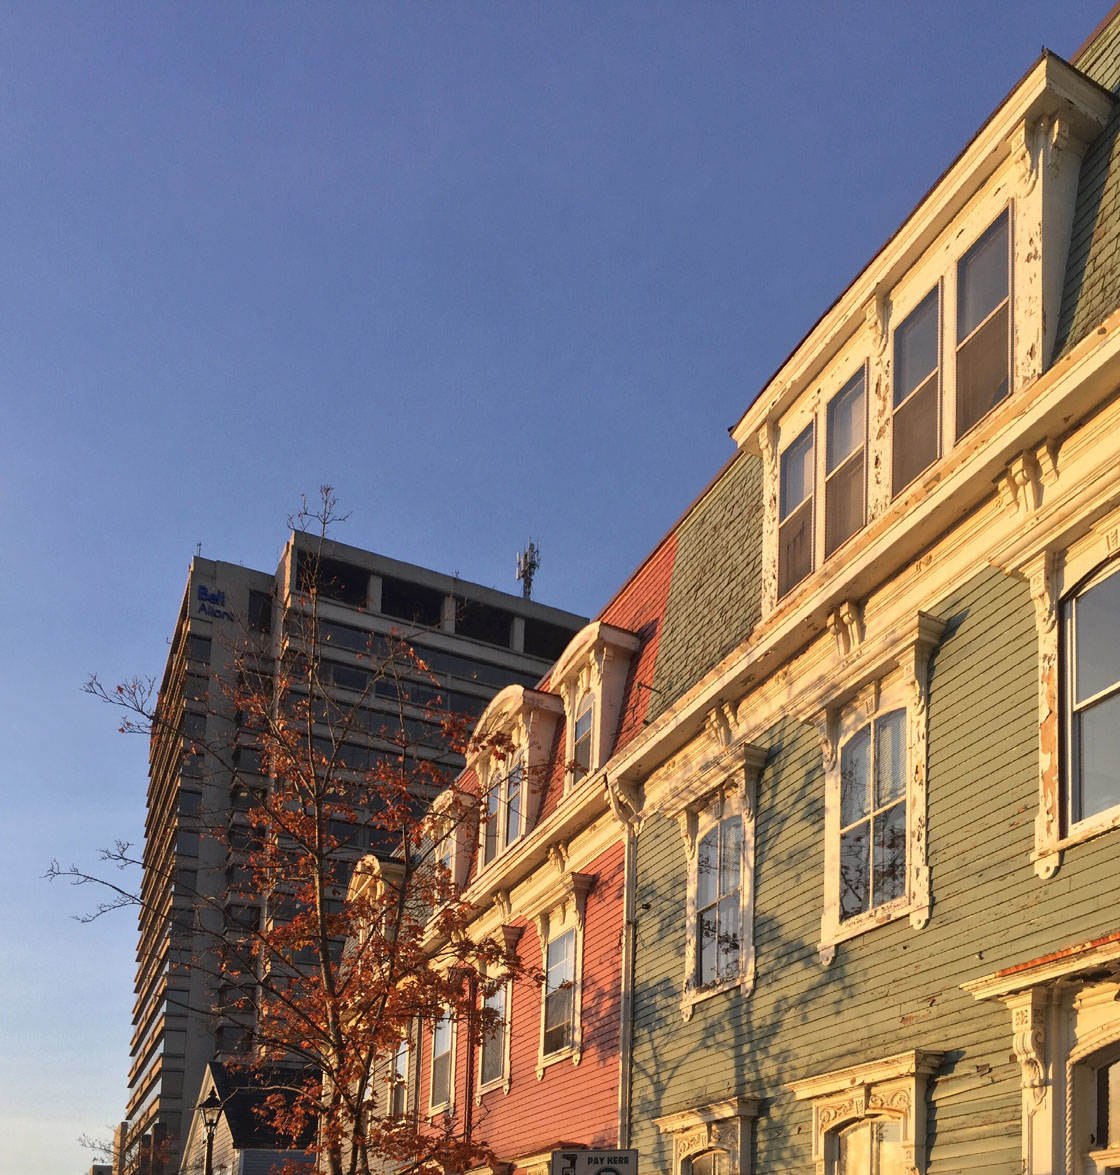
Straightening the lines in your architecture shots will make a big difference to the overall impact of the photo.
However, keep in mind that sometimes you might want to emphasize the height of a building. In such cases, the perspective distortion will actually help to convey this, so straightening the lines would be counter-productive.
Another thing to consider is that stretching a digital photograph will degrade the quality of the image to a certain degree. So when straightening your photos, keep an eye on the image quality of the areas you've stretched.
If the quality looks too poor, try straightening the lines just a little bit so that they're somewhere in the middle between your original and a truly vertical photo.
And of course, when you stretch the photo you'll lose some parts of the original photo which results in a cropped final image. So make sure the edges of the photo aren't too important.
2. Add A Blue Color Cast To Dull-Colored Photos
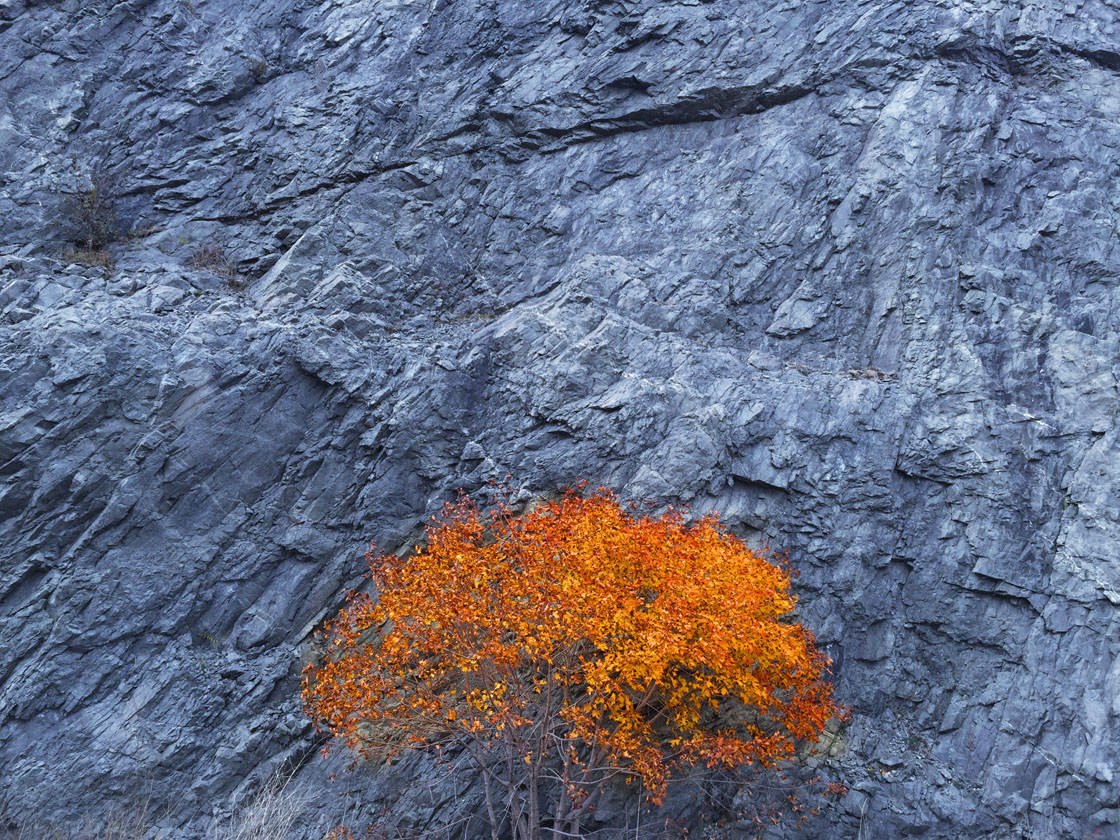
This is a great technique to add drama to dull nature photos. When photographing nature on a dull overcast day, the resulting images can sometimes be boring, especially when the subject matter isn't vivid to begin with.
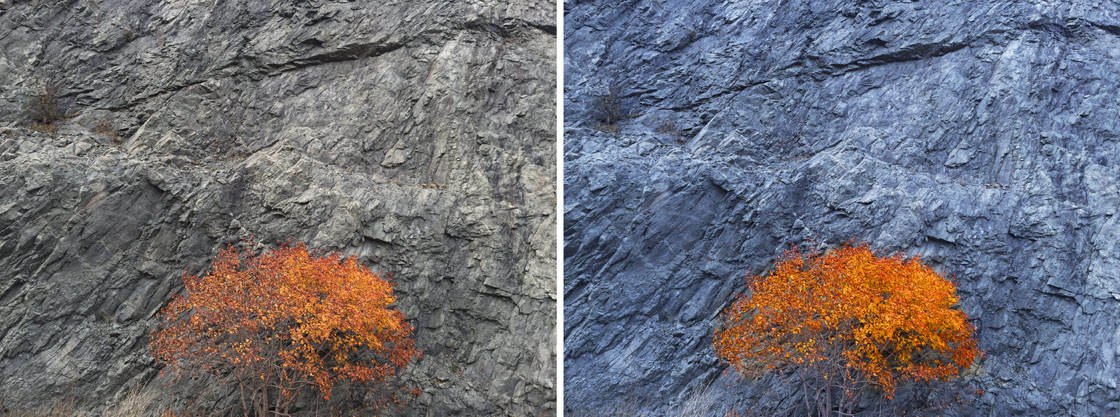
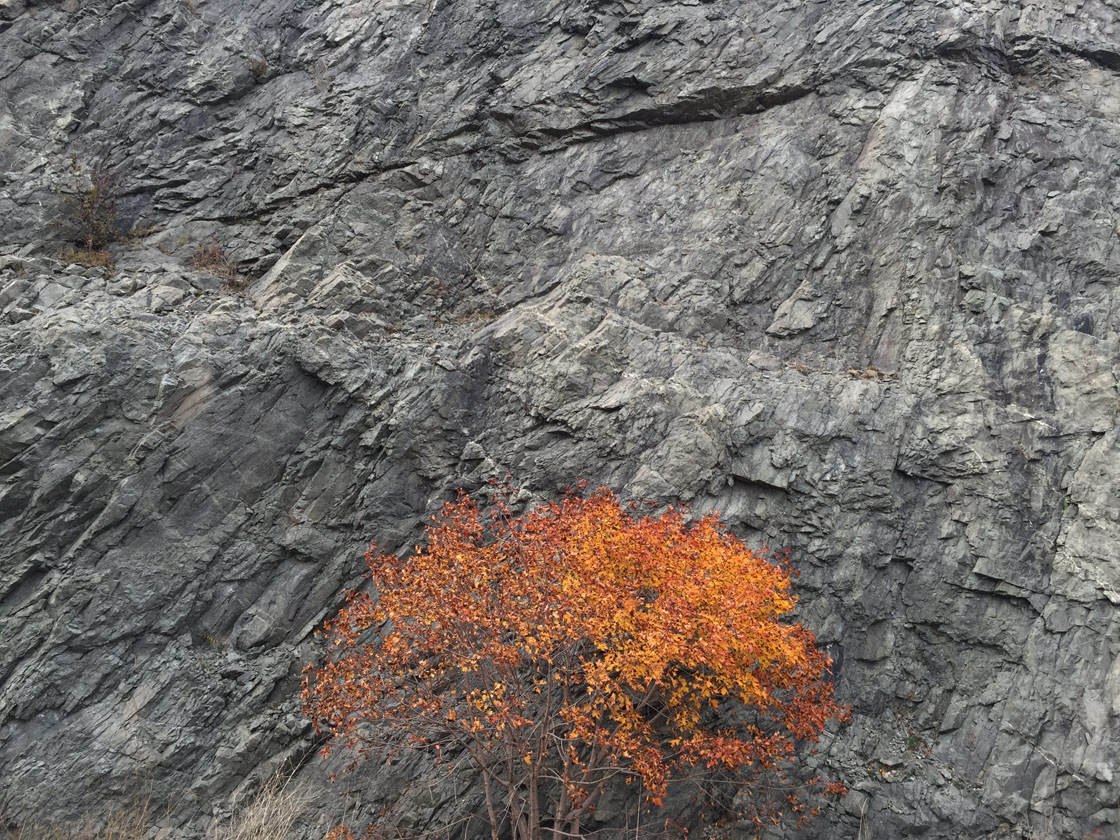
Take a look at this photo of an autumn tree at the base of a rock cliff. While the photo has some degree of visual interest, the overall scene is a bit dull and muted.
Now I'll show you how to use the Pixelmator app to add a beautiful blue color cast to the photo.
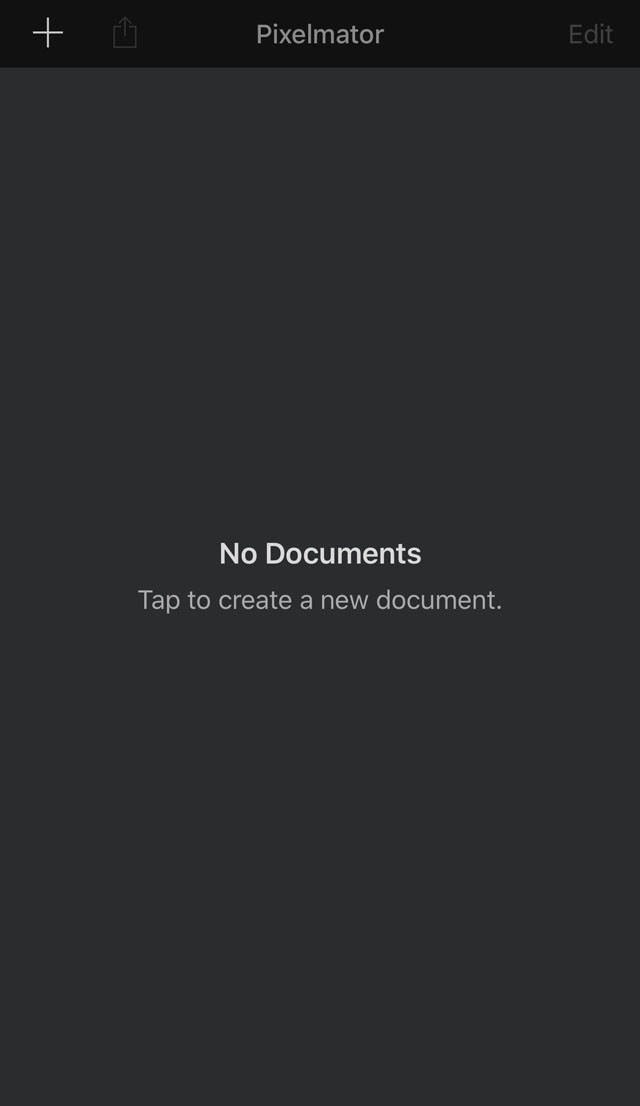
Open Pixelmator, then tap the plus icon (+) at the top left of the screen. Tap Photos, then select the picture you want to work on.
When the photo opens, tap the Paintbrush icon at the top of the screen, then tapAdjust Colors.
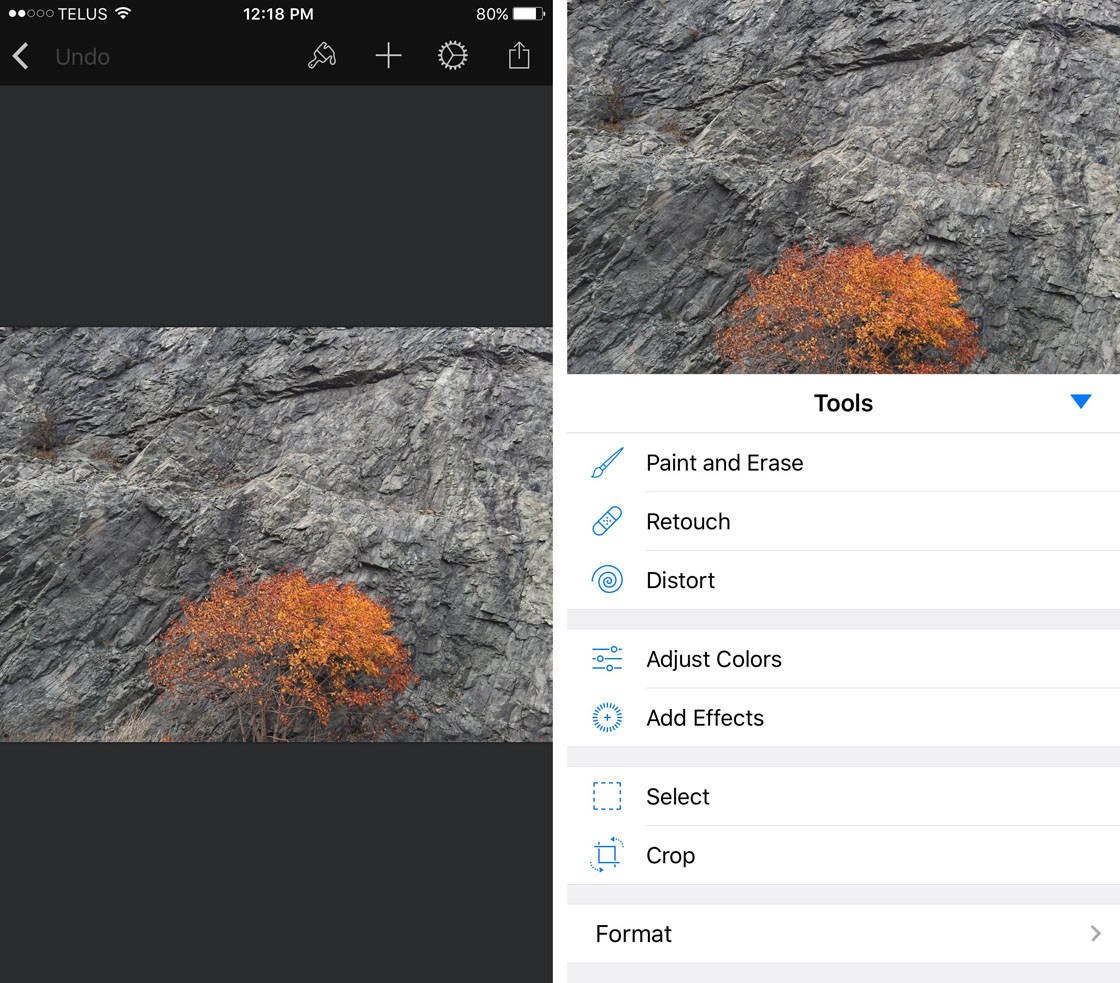
Scroll across the options at the bottom of the screen until you get to Brightness, Contrast and Saturation. Adjust the Saturation to make the colored section a bit more vibrant.
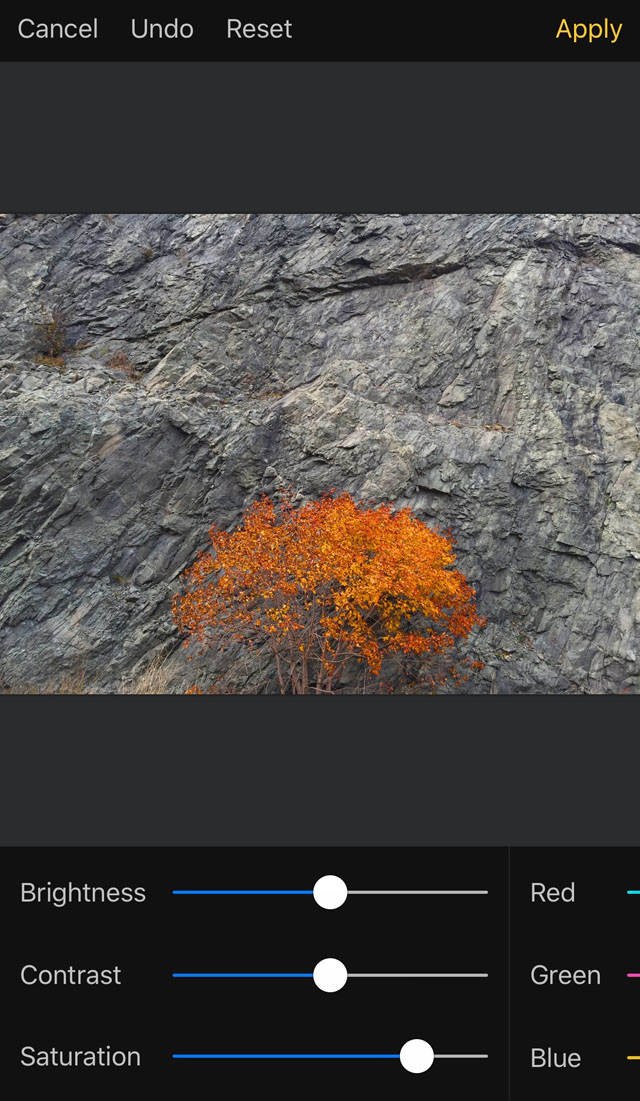
Scroll across a little bit further to the Red, Green and Blue options. Increase the Blue slider to add a blue color cast to the photo.
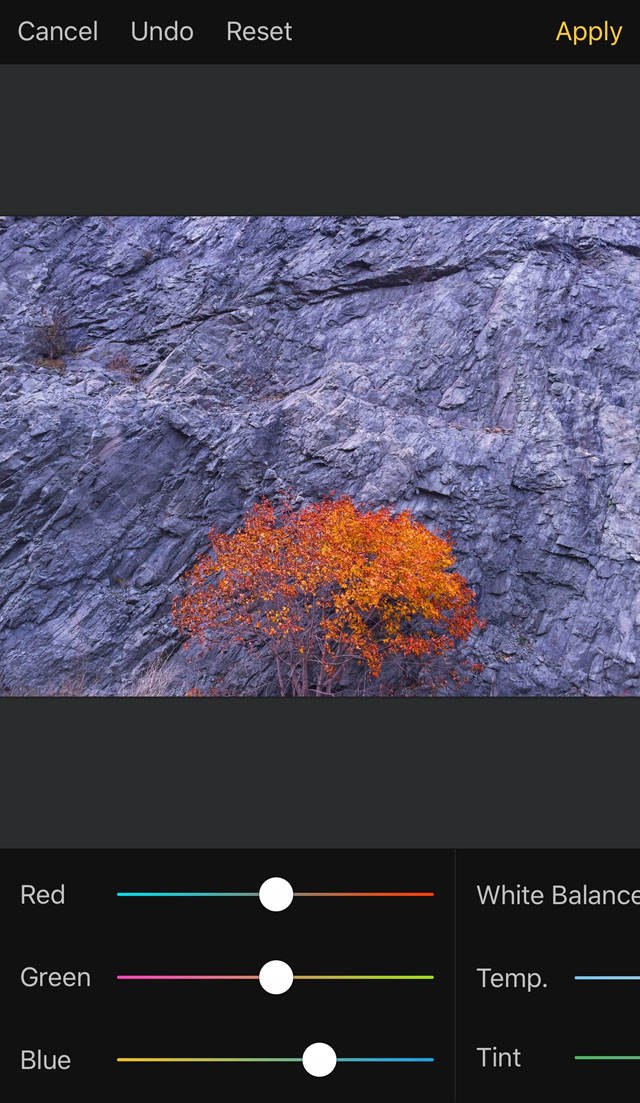
When you're happy with the color, tapApply. To save the edit, tap the arrow icon at the top right of the screen.
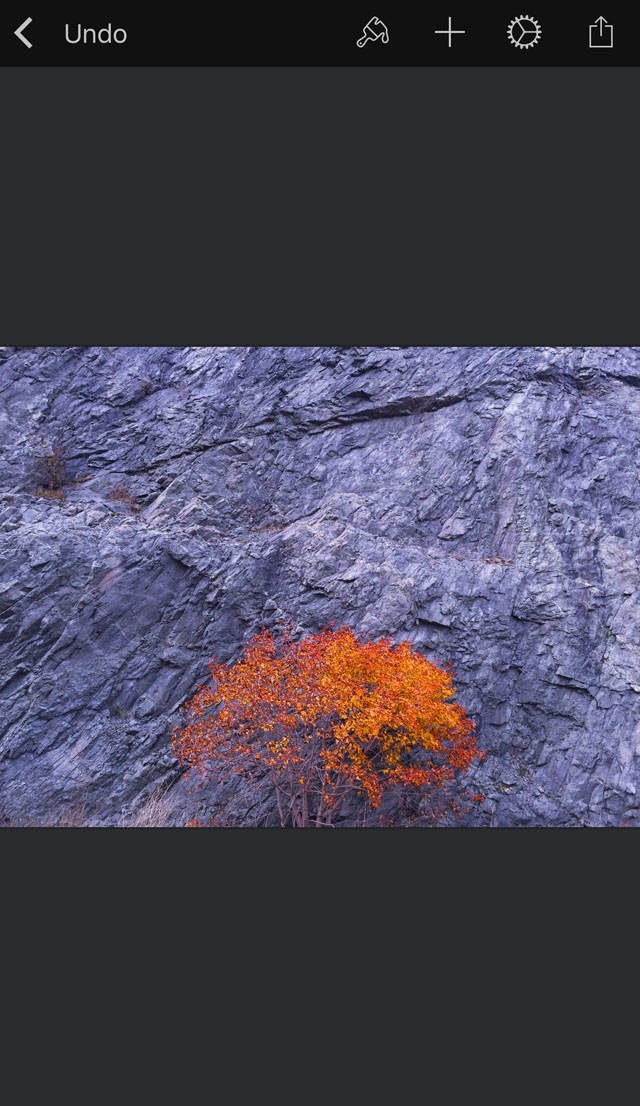
Below you can see the final edit with the blue color cast applied.
The rock face in the original photo was a dull gray, but the blue really increases the visual value of the photo.
If you're an advanced Pixelmator user, you might also want to experiment with using a mask to isolate the tree so that you can adjust the tree's colors and intensity independently of the cliff face.
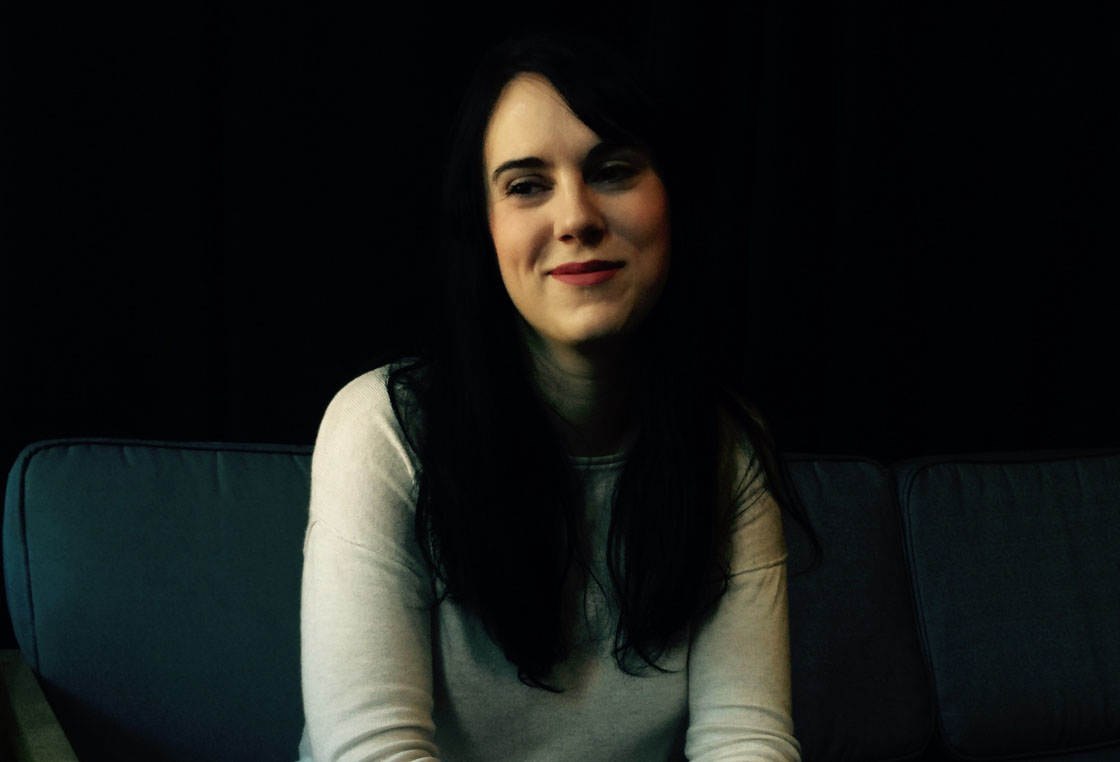
3. Crop Your Portrait Photos
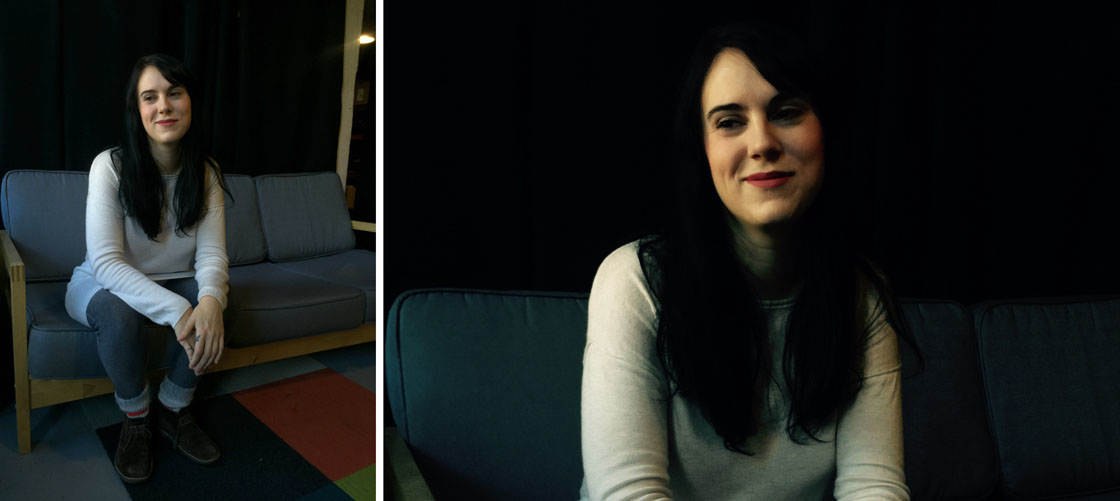
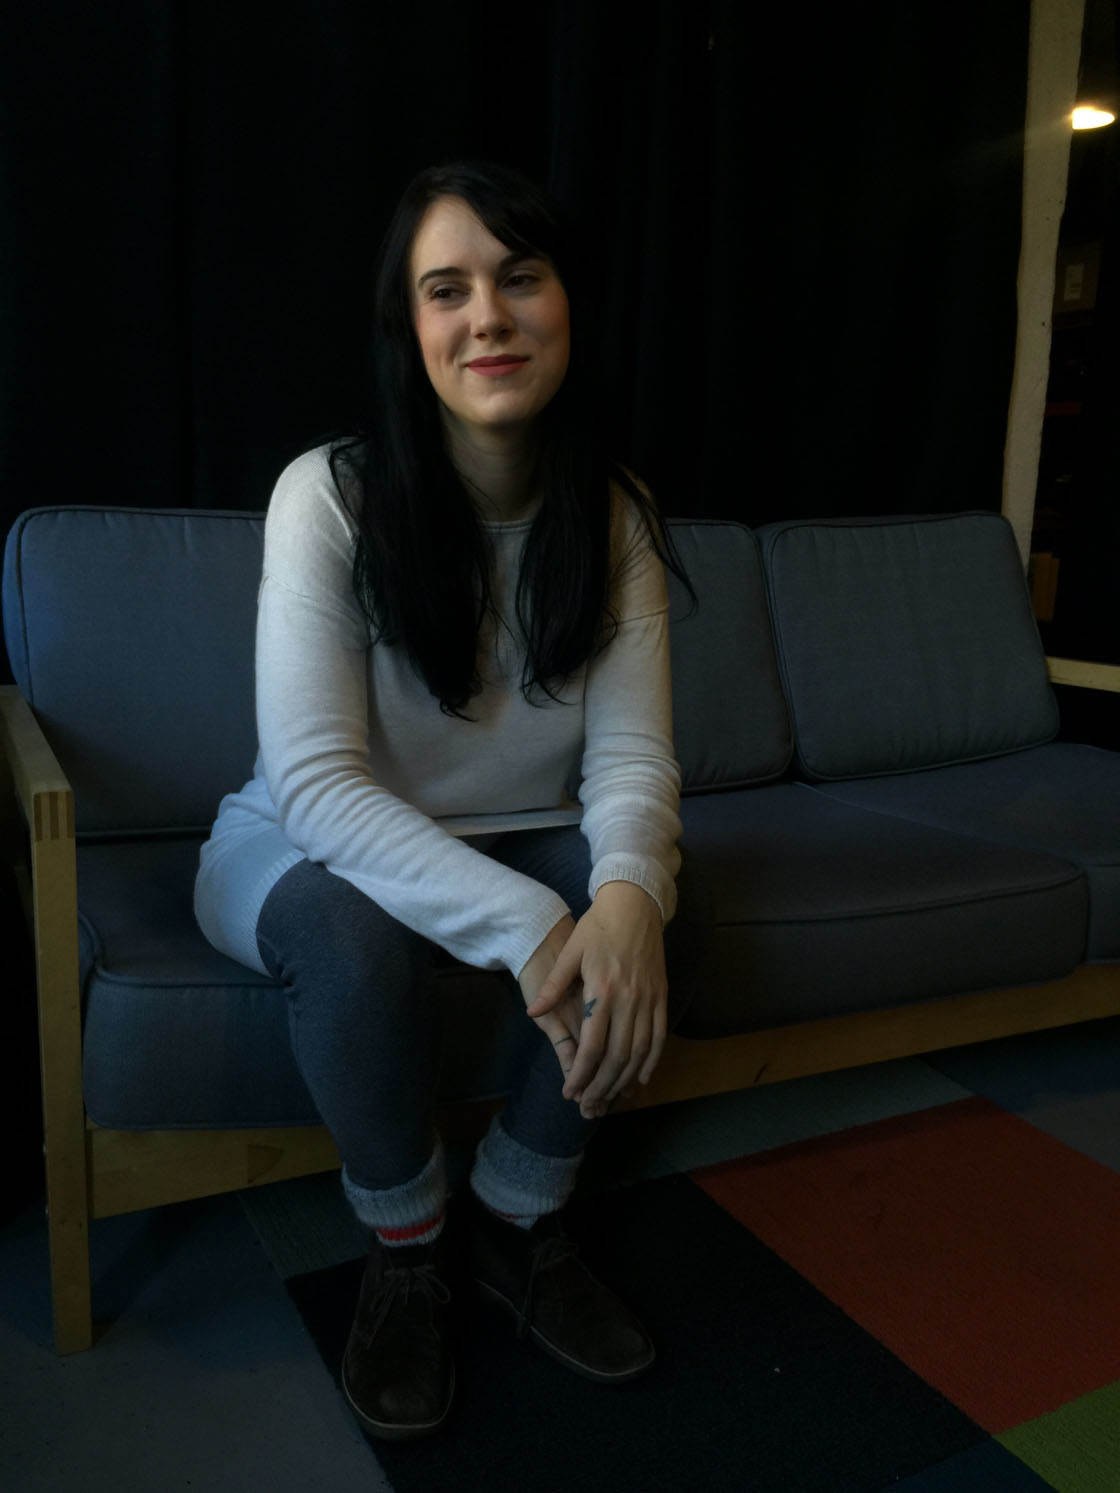
The iPhone has a fairly wide angle lens, and if you get too close to your subject when shooting portraits, their facial features can appear distorted. For example, their nose might appear disproportionately large.
A quick solution to the wide-angle lens problem is to shoot from further away, then crop closer in post-processing.
Obviously the further away you shoot from, the more you'll have to crop the image. Whenever you crop a photo, you lose pixels which results in a smaller image that can look poor quality if viewed or printed at a large size.
Therefore, you need to find the balance between shooting from far enough away to avoid distortion of facial features, but not too far away that you'll have to crop too much of the image.
Most photo editing apps have a Crop tool, so when you've taken your photo, open it up in your favorite editing app. I'm going to use the native iOS Photos app for this exercise, but you can use a different app if you want.
If you're using the native Photos app, open the photo you want to crop, then tap Edit at the top right. Now tap theCroptool at the bottom left of the screen (next to the blue Cancel icon).
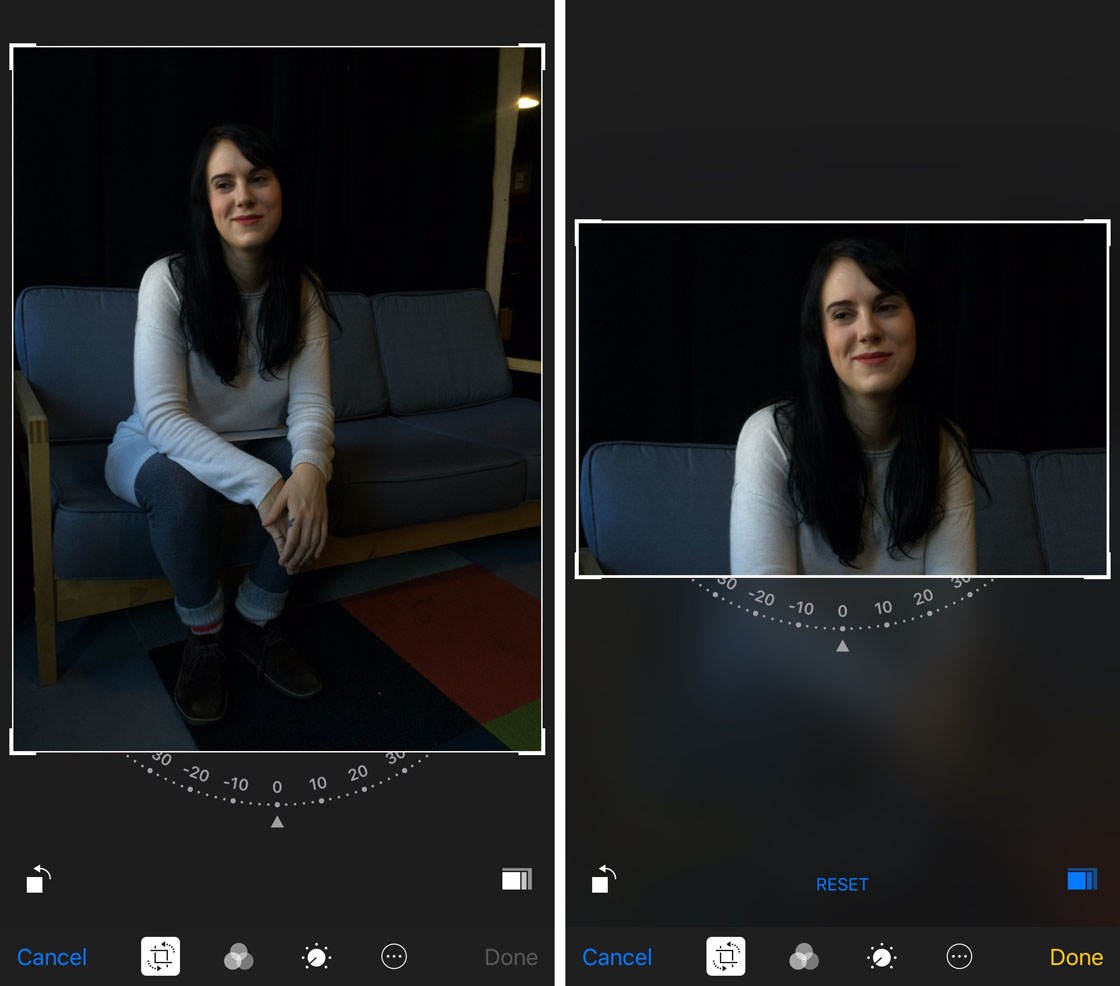
Drag the crop handles on the edge of the image to crop away the parts of the photo you don't want.
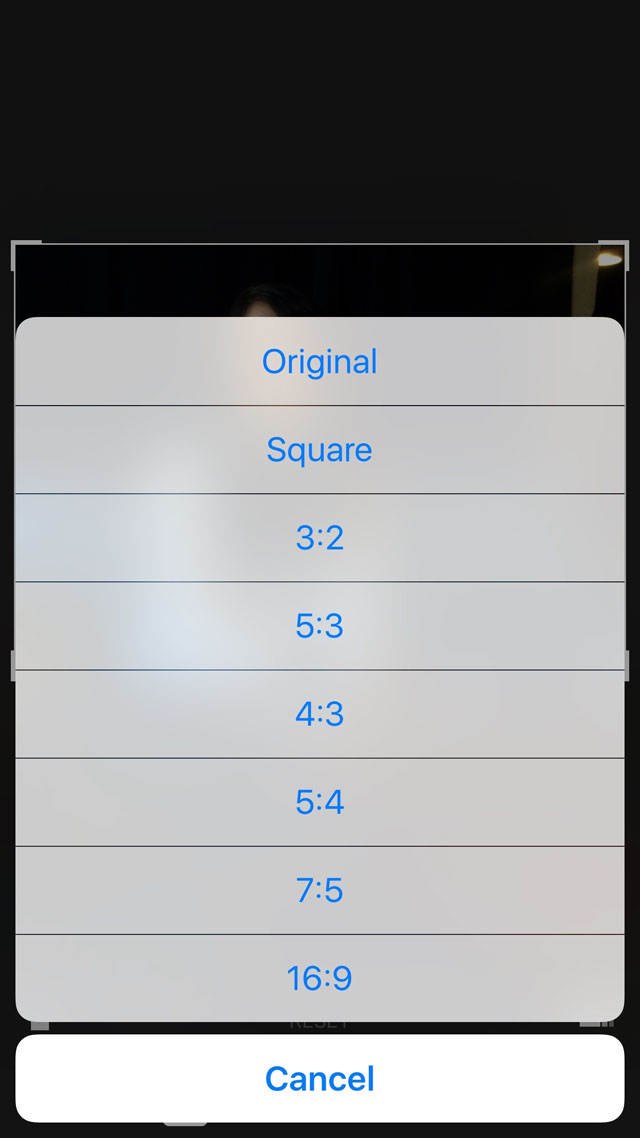
If you want to crop to a specific aspect ratio, tap the Aspect Ratio icon located directly above the yellow Done option. Select the aspect ratio from the list of options.
Below is the final image after cropping away the unwanted parts.
You might notice that the color looks a little different in this cropped version. That's because I applied an iPhone filter in the native Photos app.
If you want to do this, ensure you're still viewing the editing tools, then tap the Filters icon (three intersecting circles).
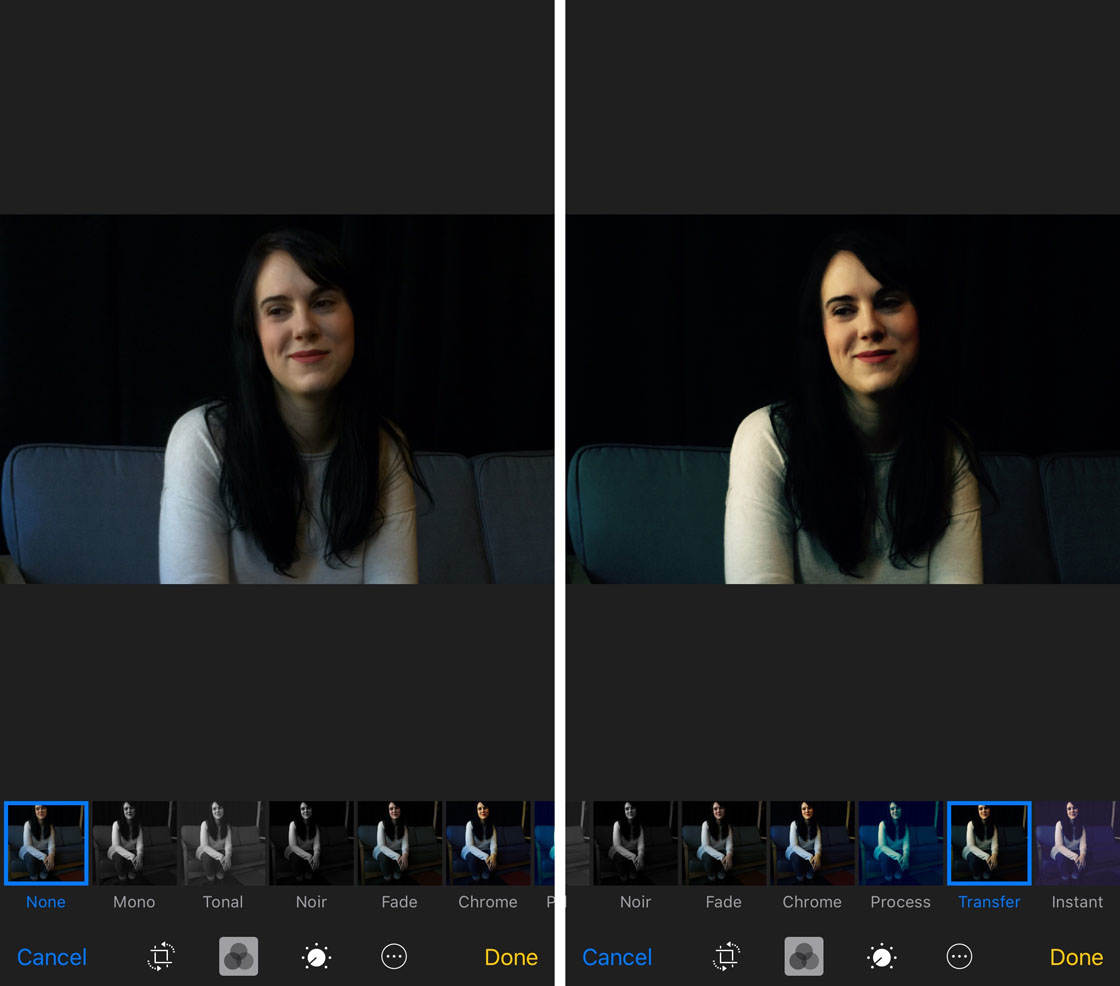
For this photo I used the Transfer filter. This filter works particularly well for a fine art color look. TapDone when you're ready to save your image.
Please note that when you save your edits in the native Photos app, you'll no longer see the original in your photos library.
However, you can remove the edits and revert back to the original photo at any time. To do this, open the photo, tap Edit, then tap the Revert option.
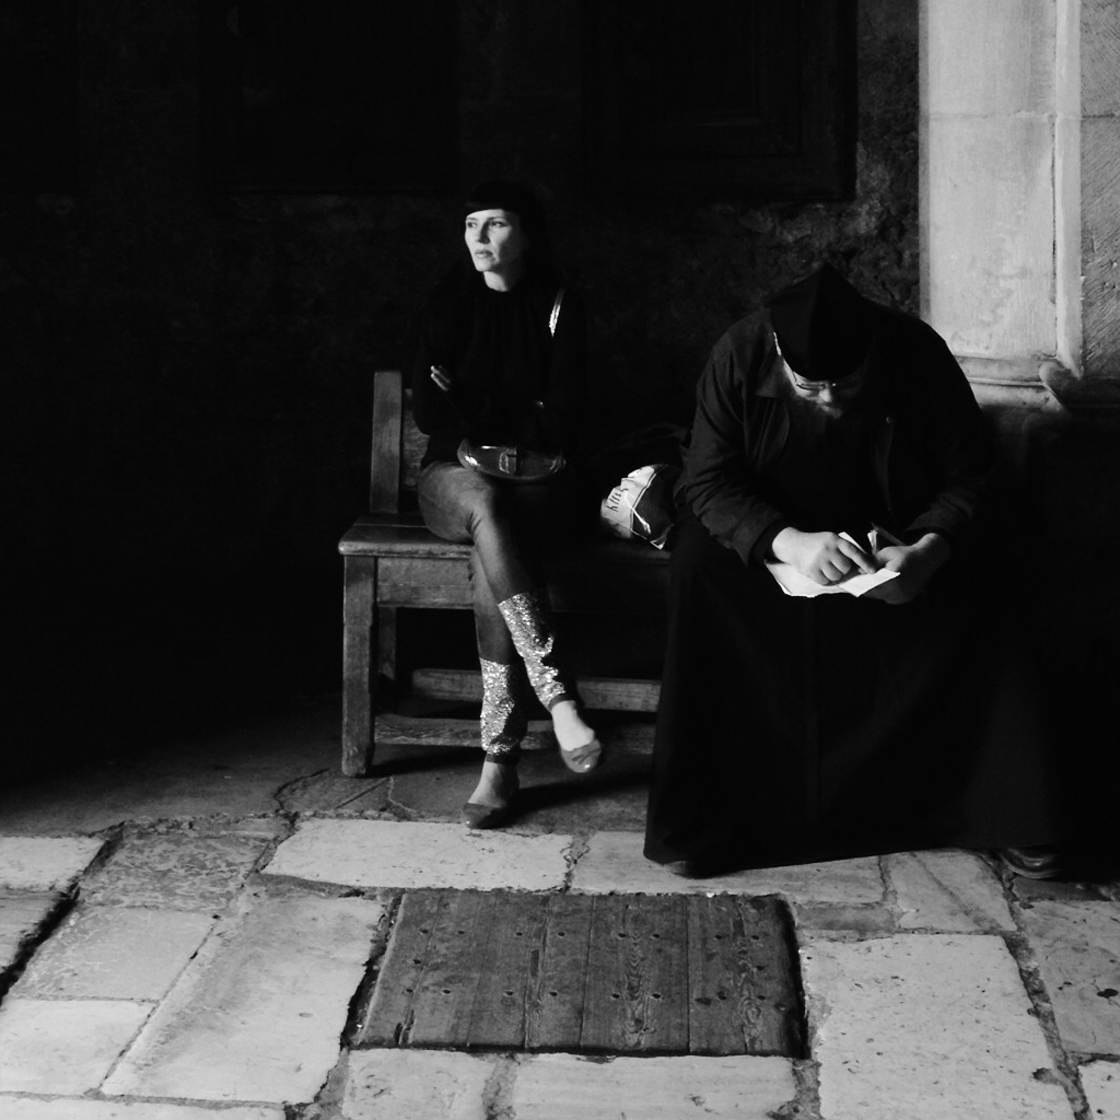
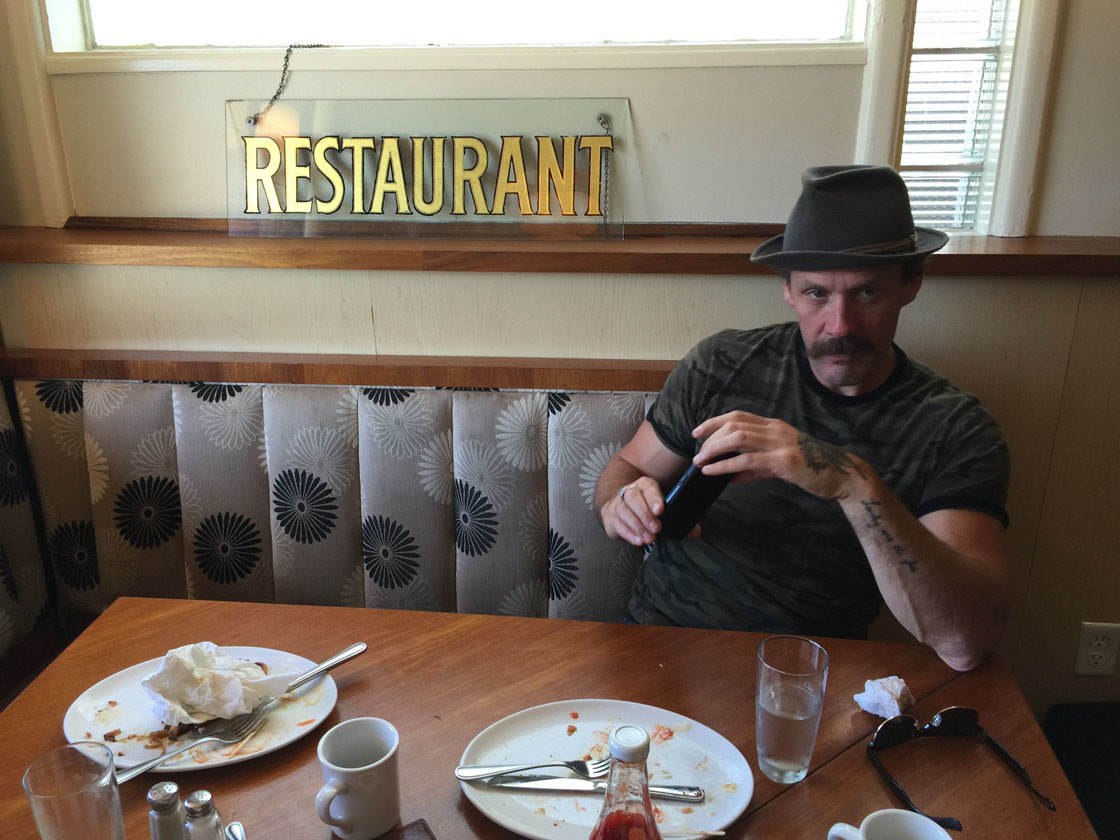
4. Create Artistic Black & White Portraits
If you want to turn an ordinary portrait photo into something more artistic, converting it to black and white is a simple yet highly effective option.
Again, there are many editing apps that let you turn an image black and white, but I'll be using the native Photos app.
This app has a very decent set of tools for creating black and white photos, especially ones that look good with the human face.
Open up your image in the Photos app, then tap Edit at the top right of the screen. Next, tap the Filters icon (three circles) at the bottom of the screen.
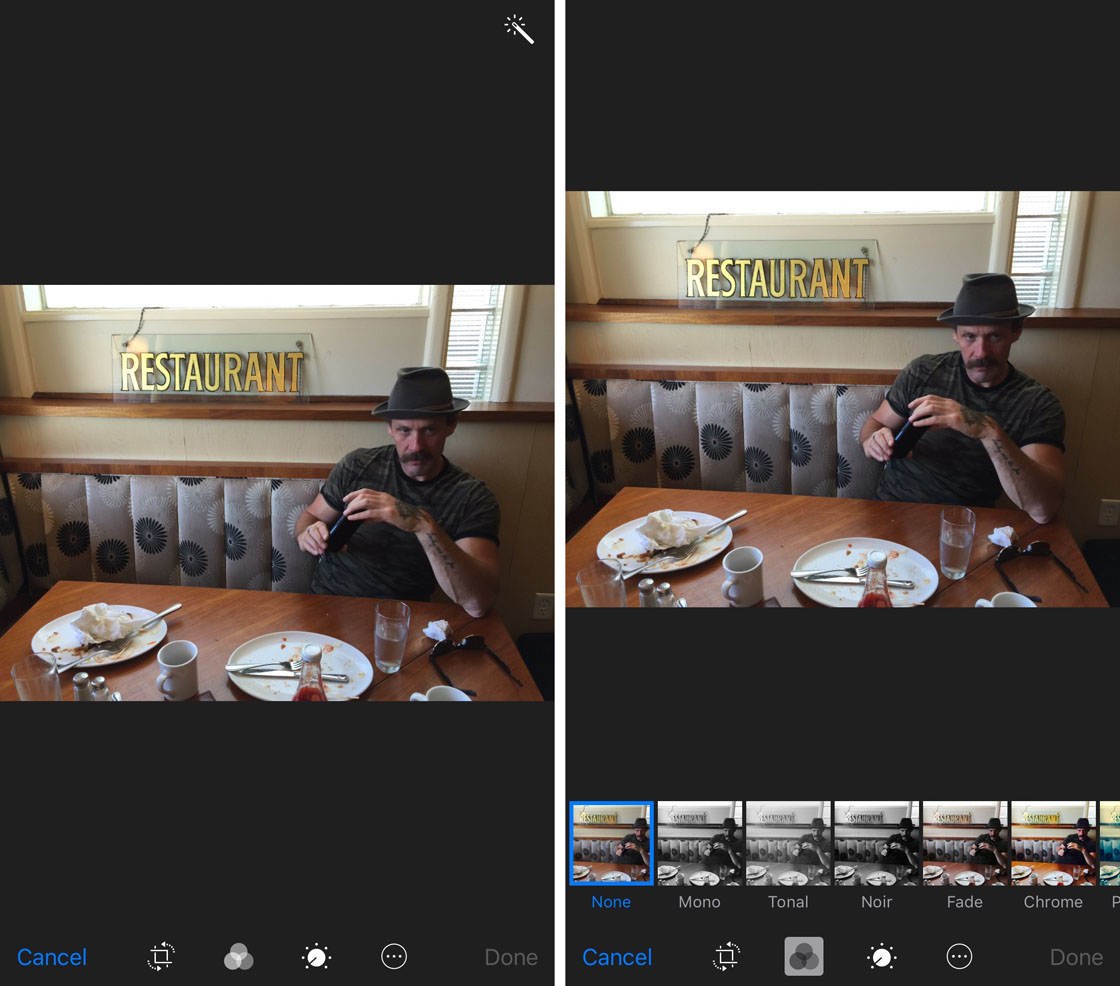
You'll now be presented with a set of filters along the bottom of the screen. The first three are black and white conversion options. Tap on Mono, then Tonal, and finally Noir.
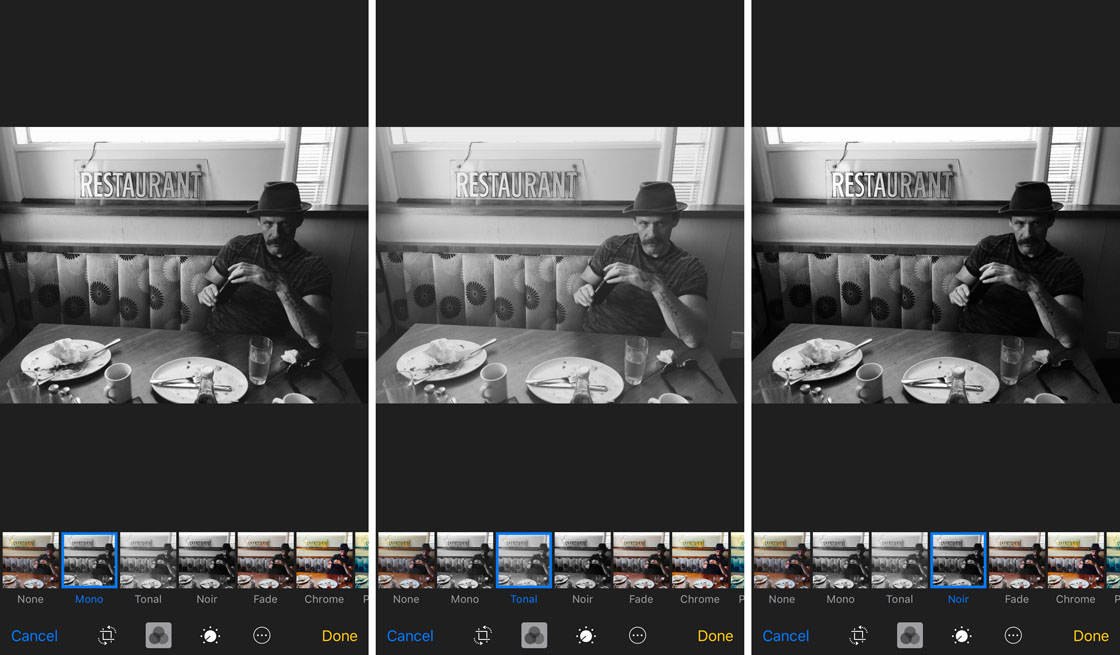
While you may find the first two options suitable for your photo, the Noir option seems to be well suited to fine art black and white portrait shots.
This is most likely due to the fact that the filter really darkens the shadow areas of your photo, giving the image a mysterious or dramatic look.
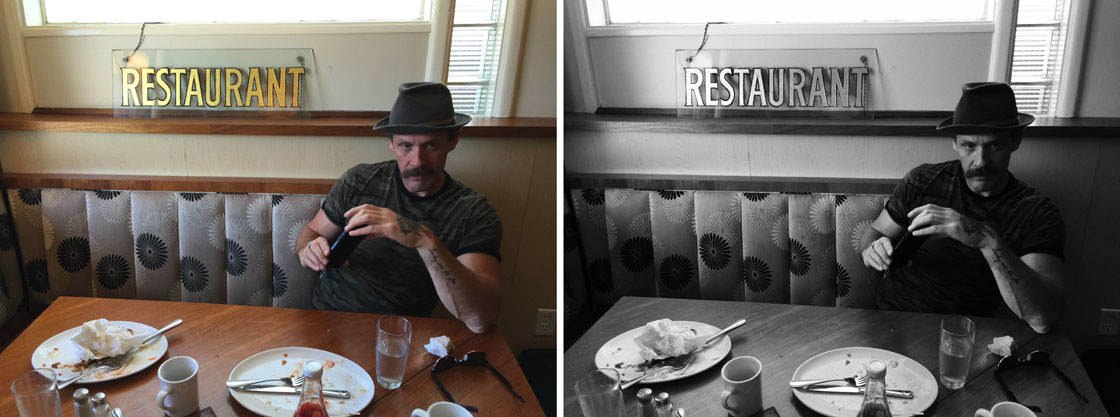
When you're happy with your black and white edit, tap Done to save the image. Below is the edited image with the Noir filter applied.
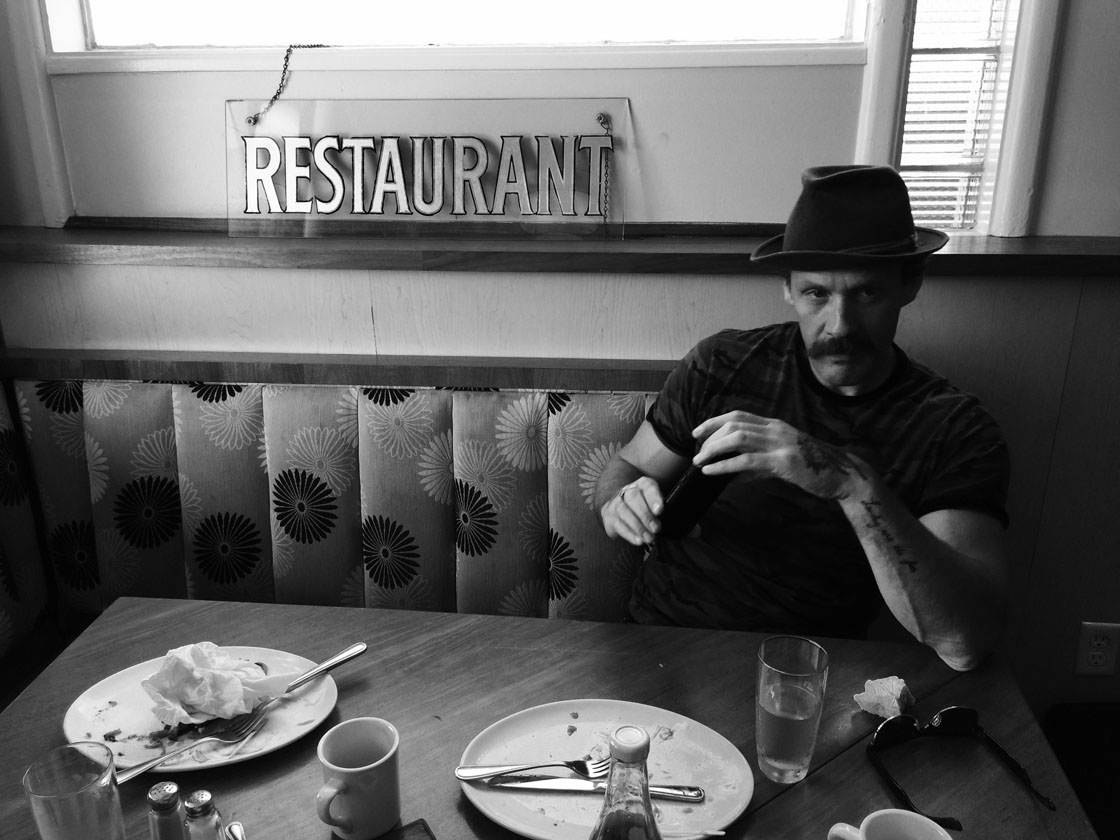
Notice how the shadows now appear dark and dramatic, and the colorful distractions have been removed. The photo now looks like it could be a still from a movie!
5. Add Fake Light To City Lamp Posts
If you're shooting in the city during early morning or late evening, you can capture the wonderful glow of street lights. But if you're out during the day, you won't have the option of photographing this rich, warm light.
A remedy for this is to create a fake lamp illumination using the LensLight app. This technique can be used on any photo that has an unlit street lamp in the scene.
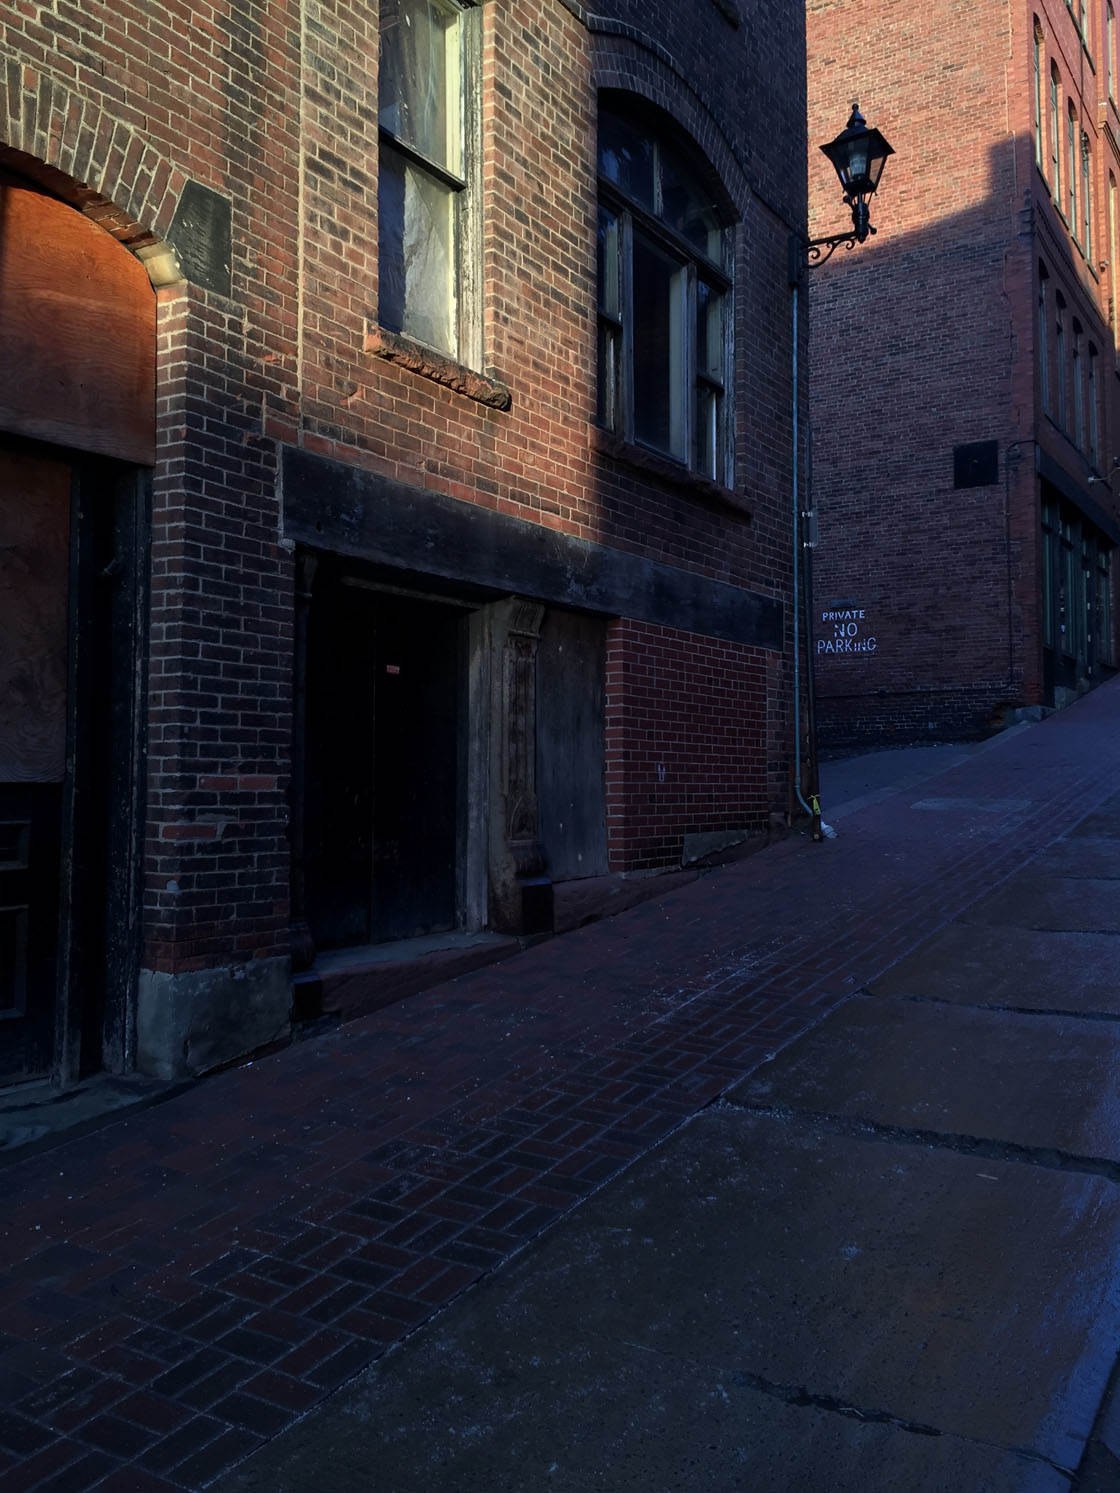
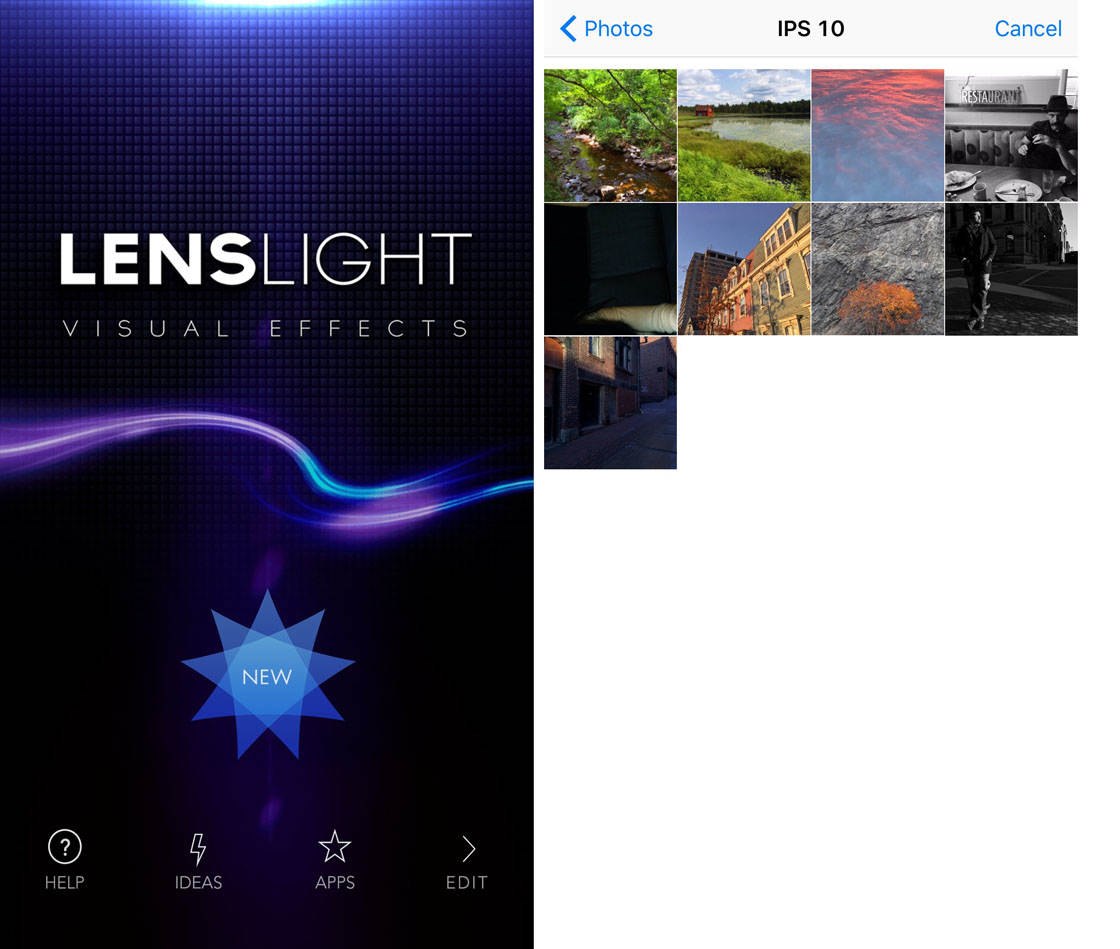
Open the LensLight app, then tap theNew button that's located inside the star icon. Select the street light photo that you want to edit.
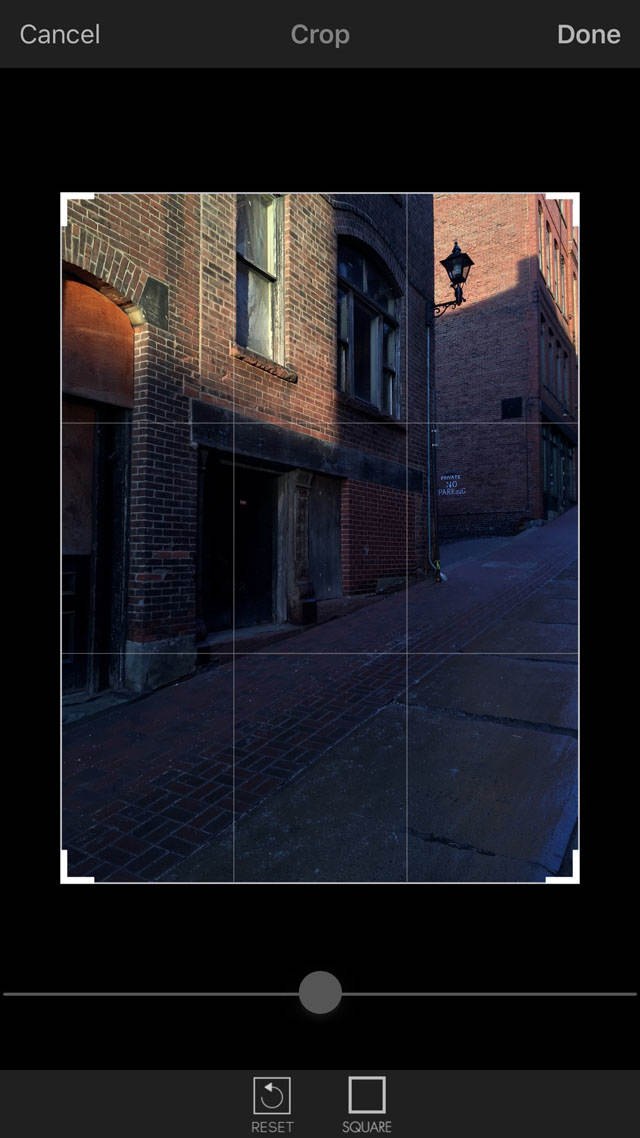
On the next screen, you can crop the photo if you like, then tapDone.
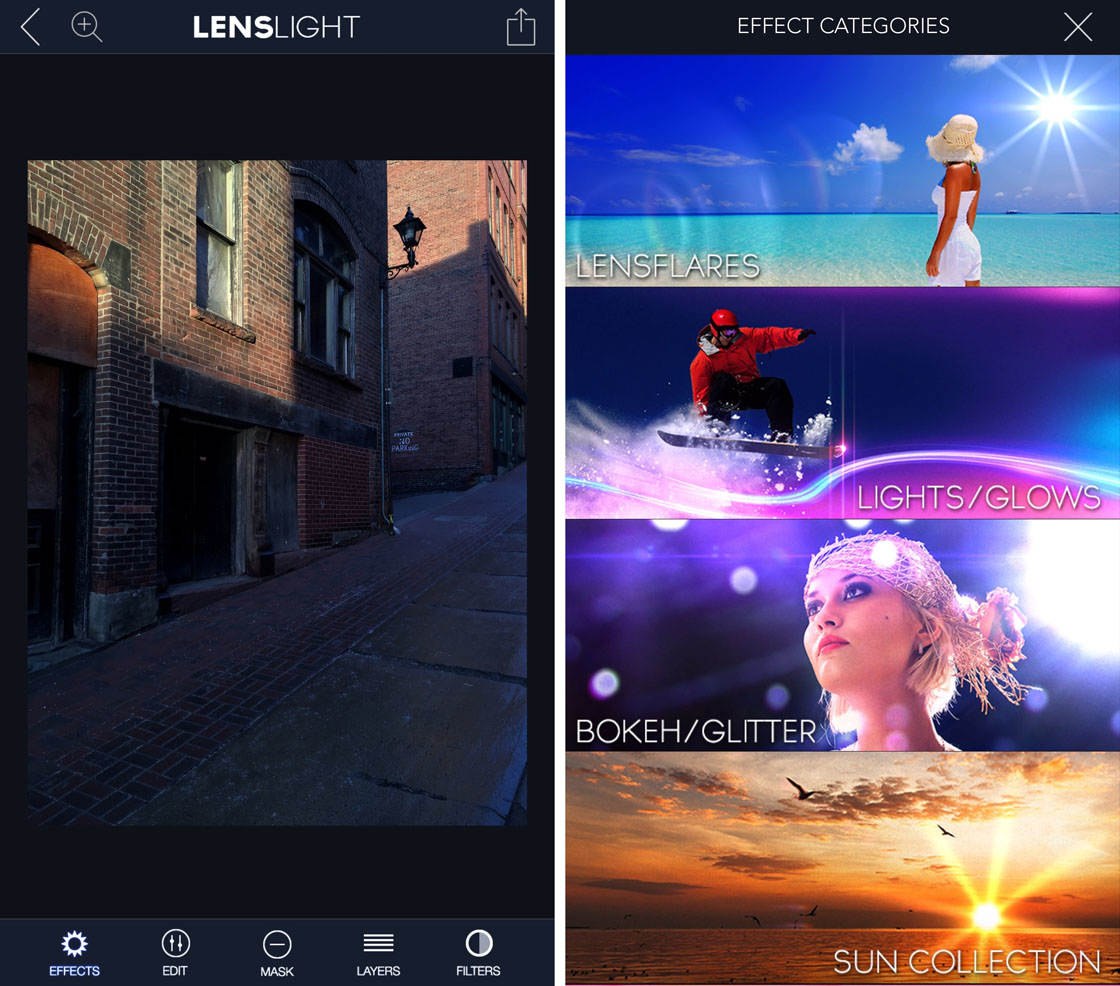
Tap the Effects icon at the bottom left of the screen, then tap the Lensflares category.
Scroll across the list of effects and tap on the effect called Sol Invictus.
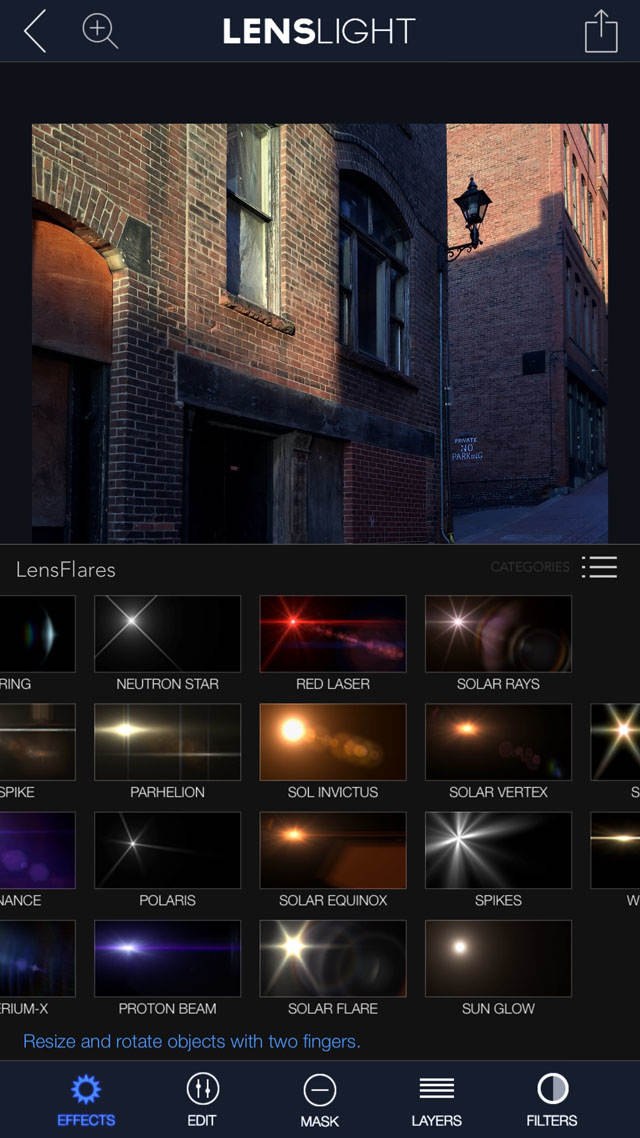
A yellow/orange orb will appear in the middle of your photo. You can adjust its location by dragging it with your finger, and you can alter its size by pinch-zooming in and out with two fingers.
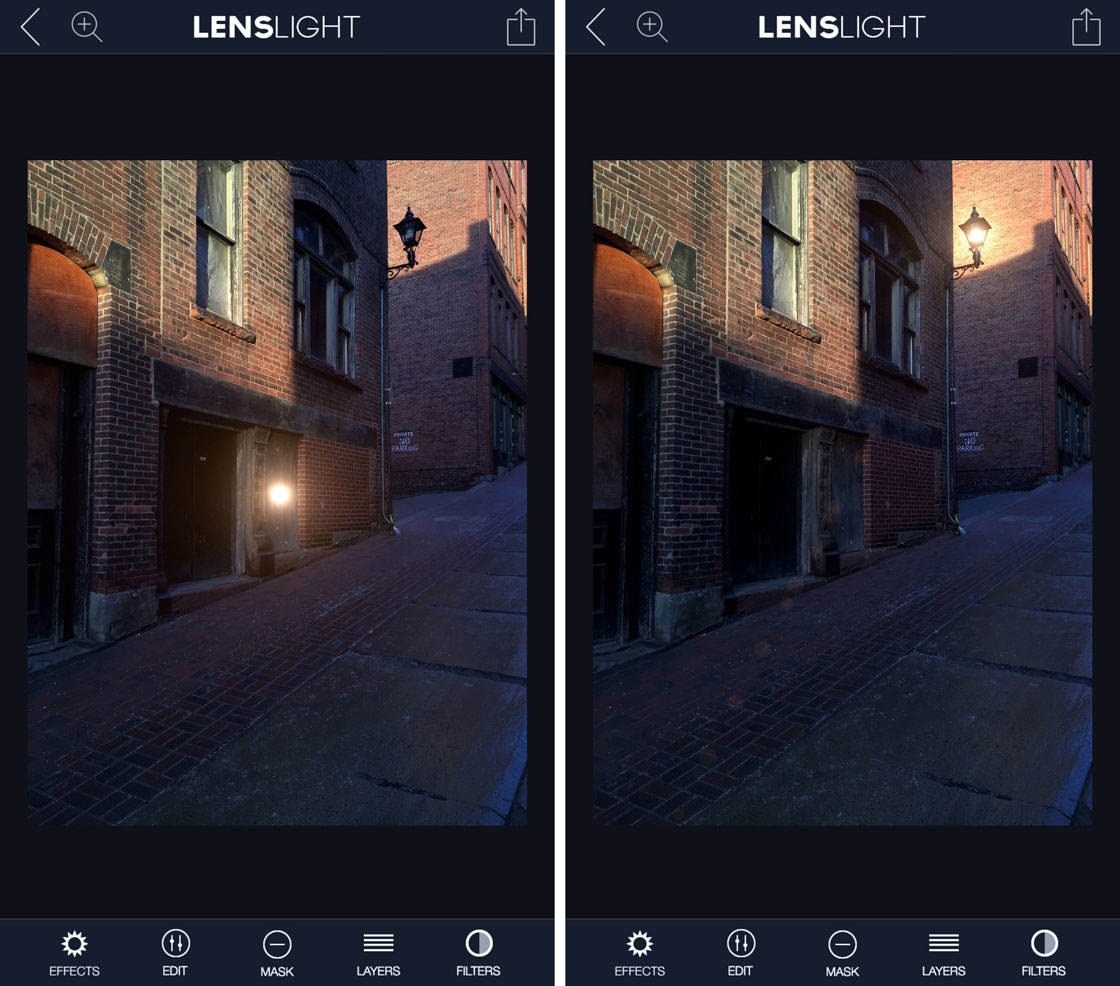
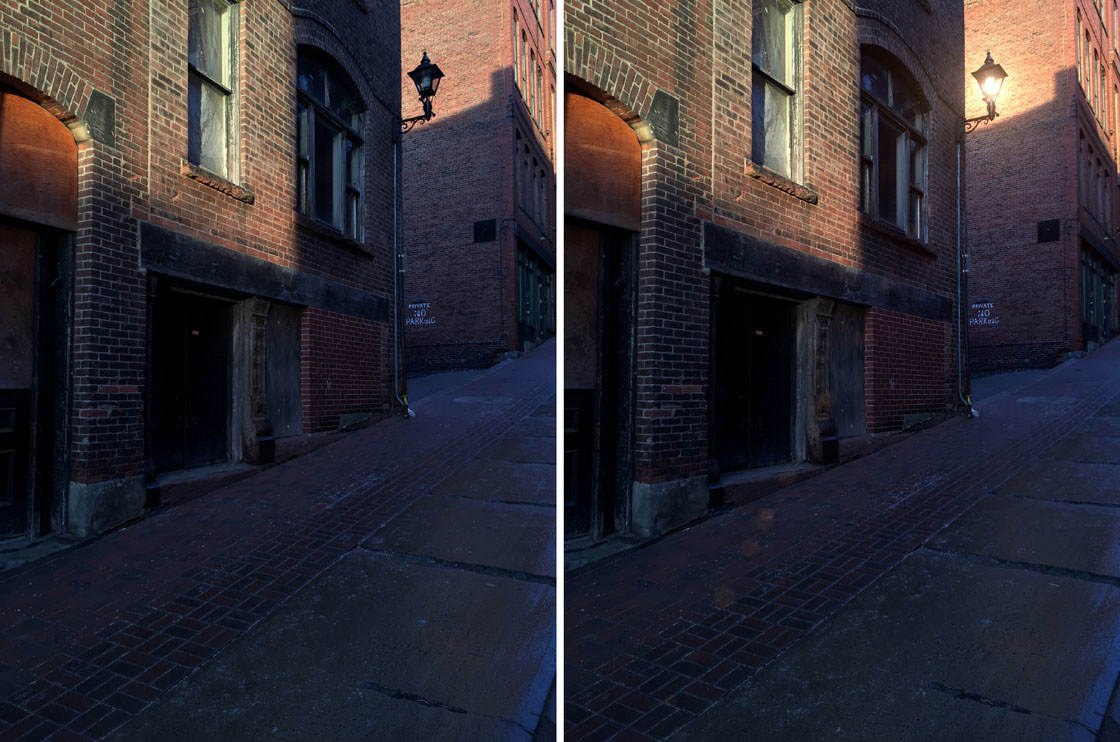
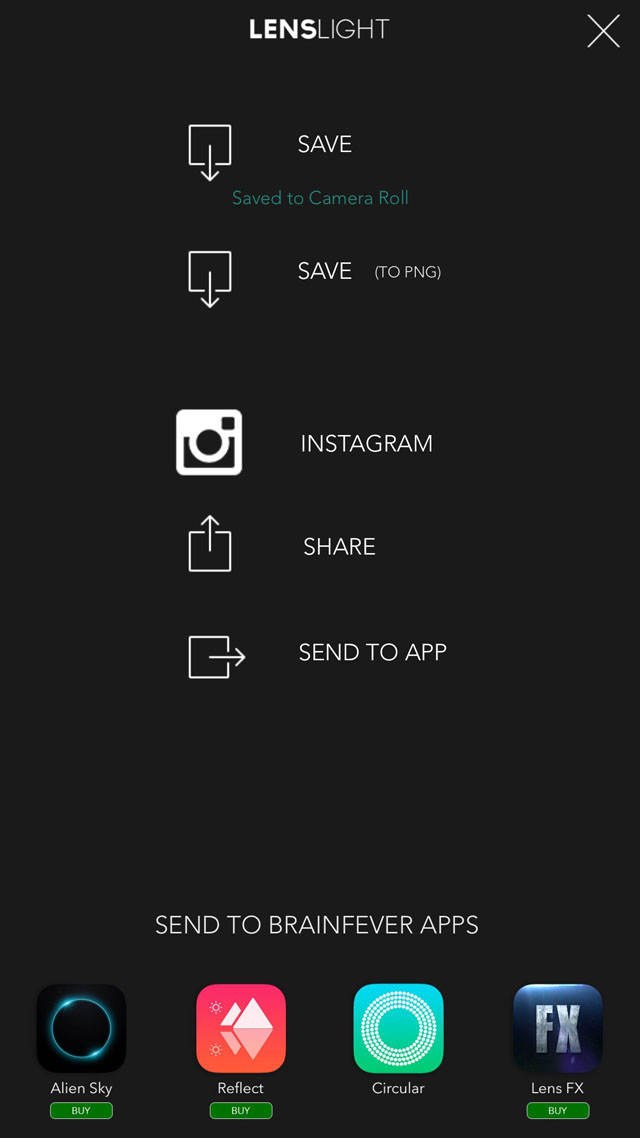
When you have the fake light over the street lamp, tap the arrow icon at top right of the screen and save the photo to your camera roll.
Below is the edited photo with the fake illumination placed over the unlit street lamp.
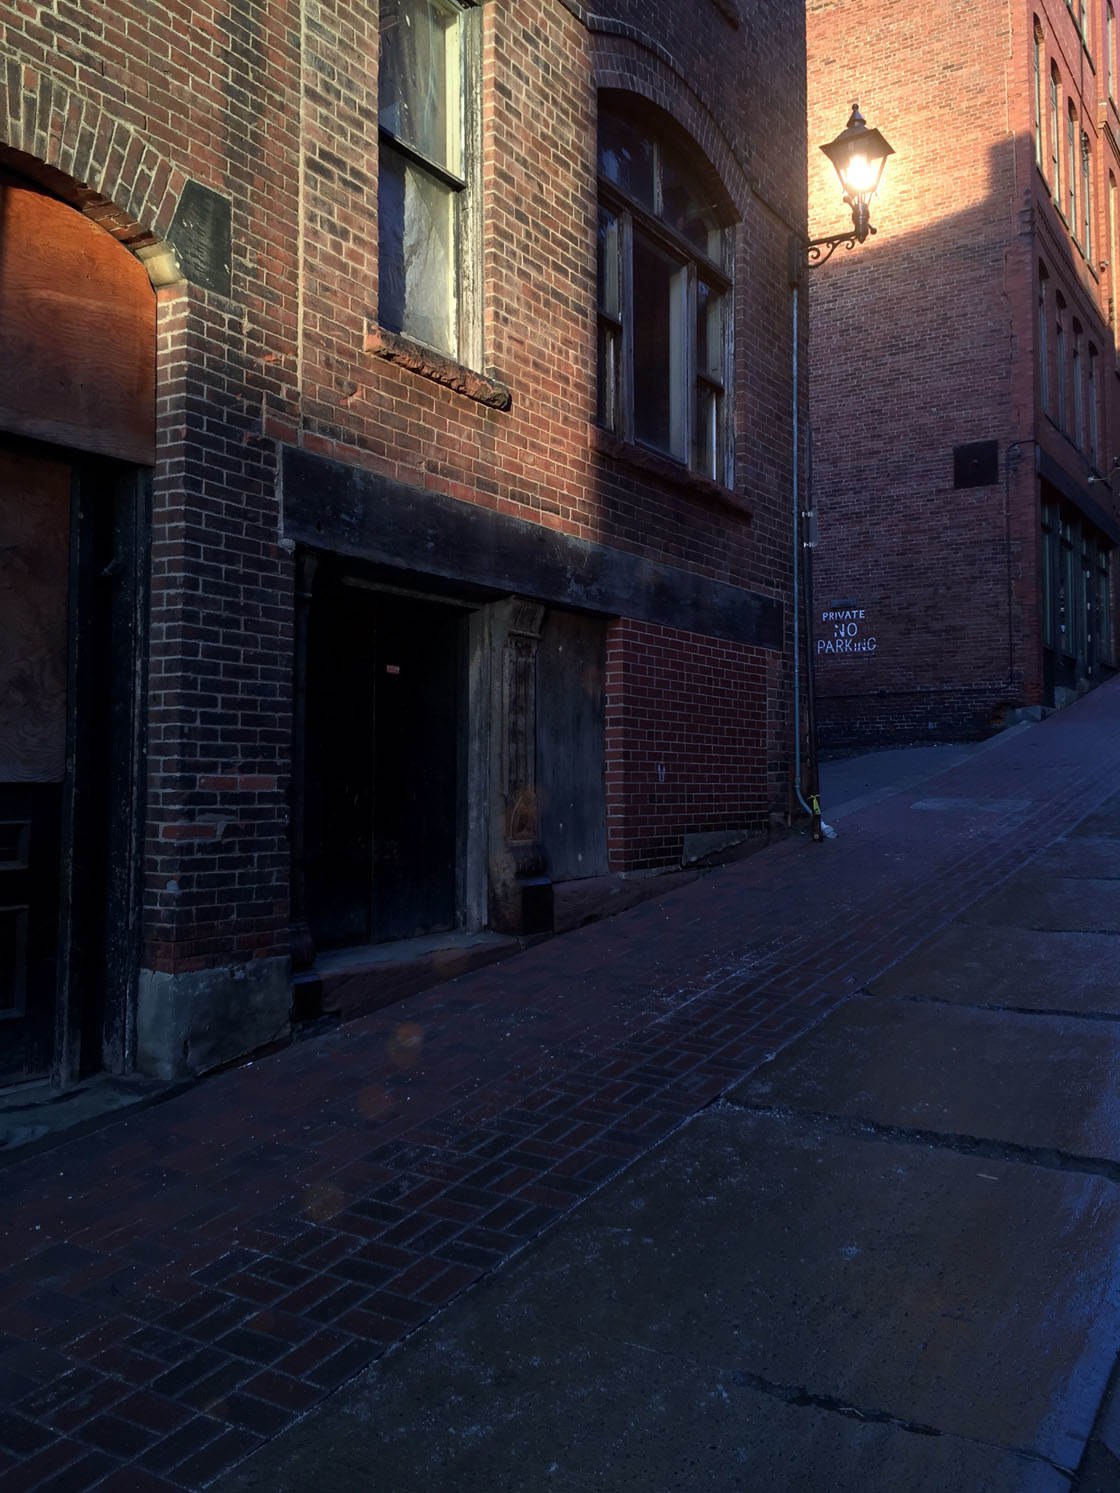
Note that you could also use this technique on indoor photos to add illumination to lamps and ceiling lights. And you can use the same procedure for adding sun flare to outdoor images.
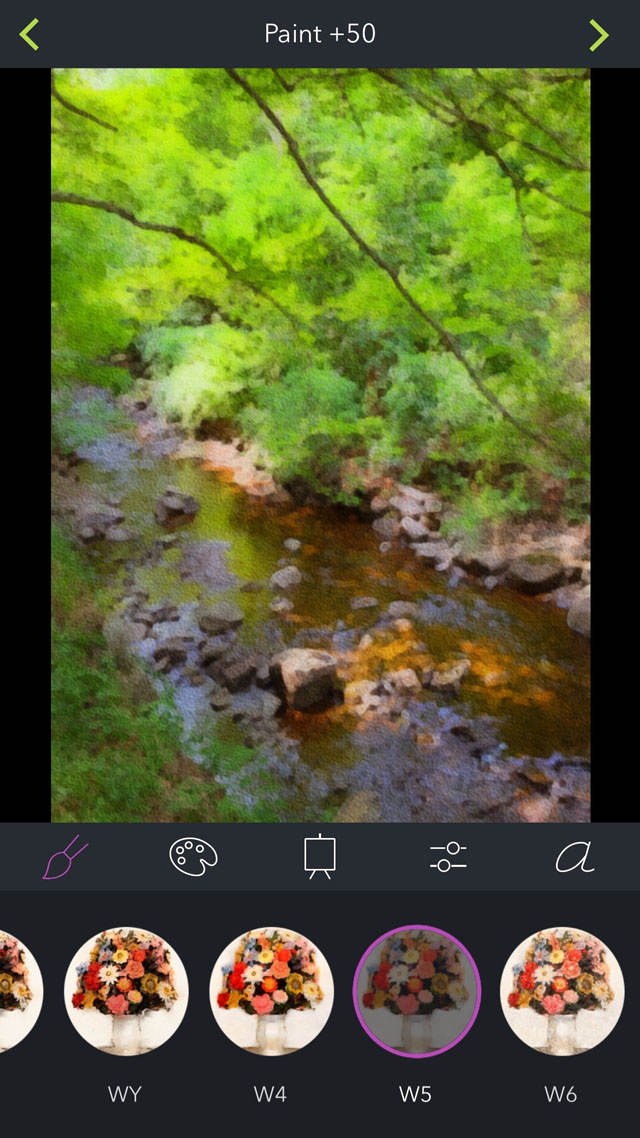
6. Turn Your Landscape Photos Into Paintings
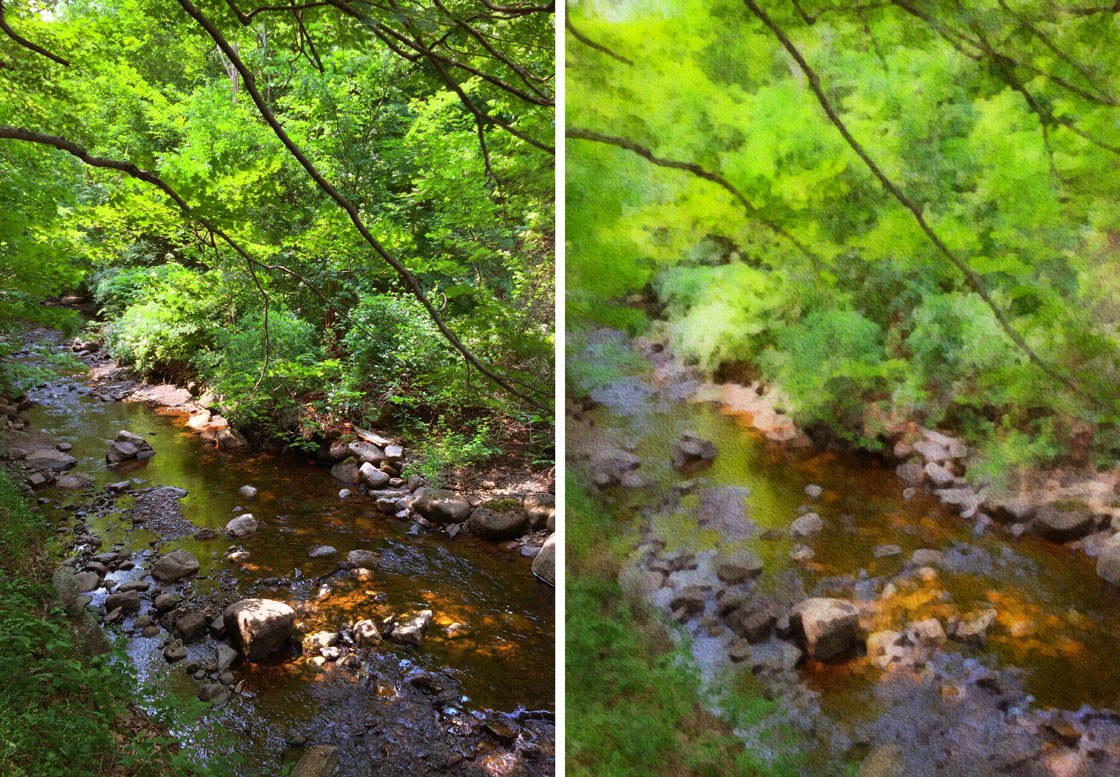
If you want to add a truly artistic flair to your landscape photos, use an app such as Brushstroke to create beautiful painterly style images.
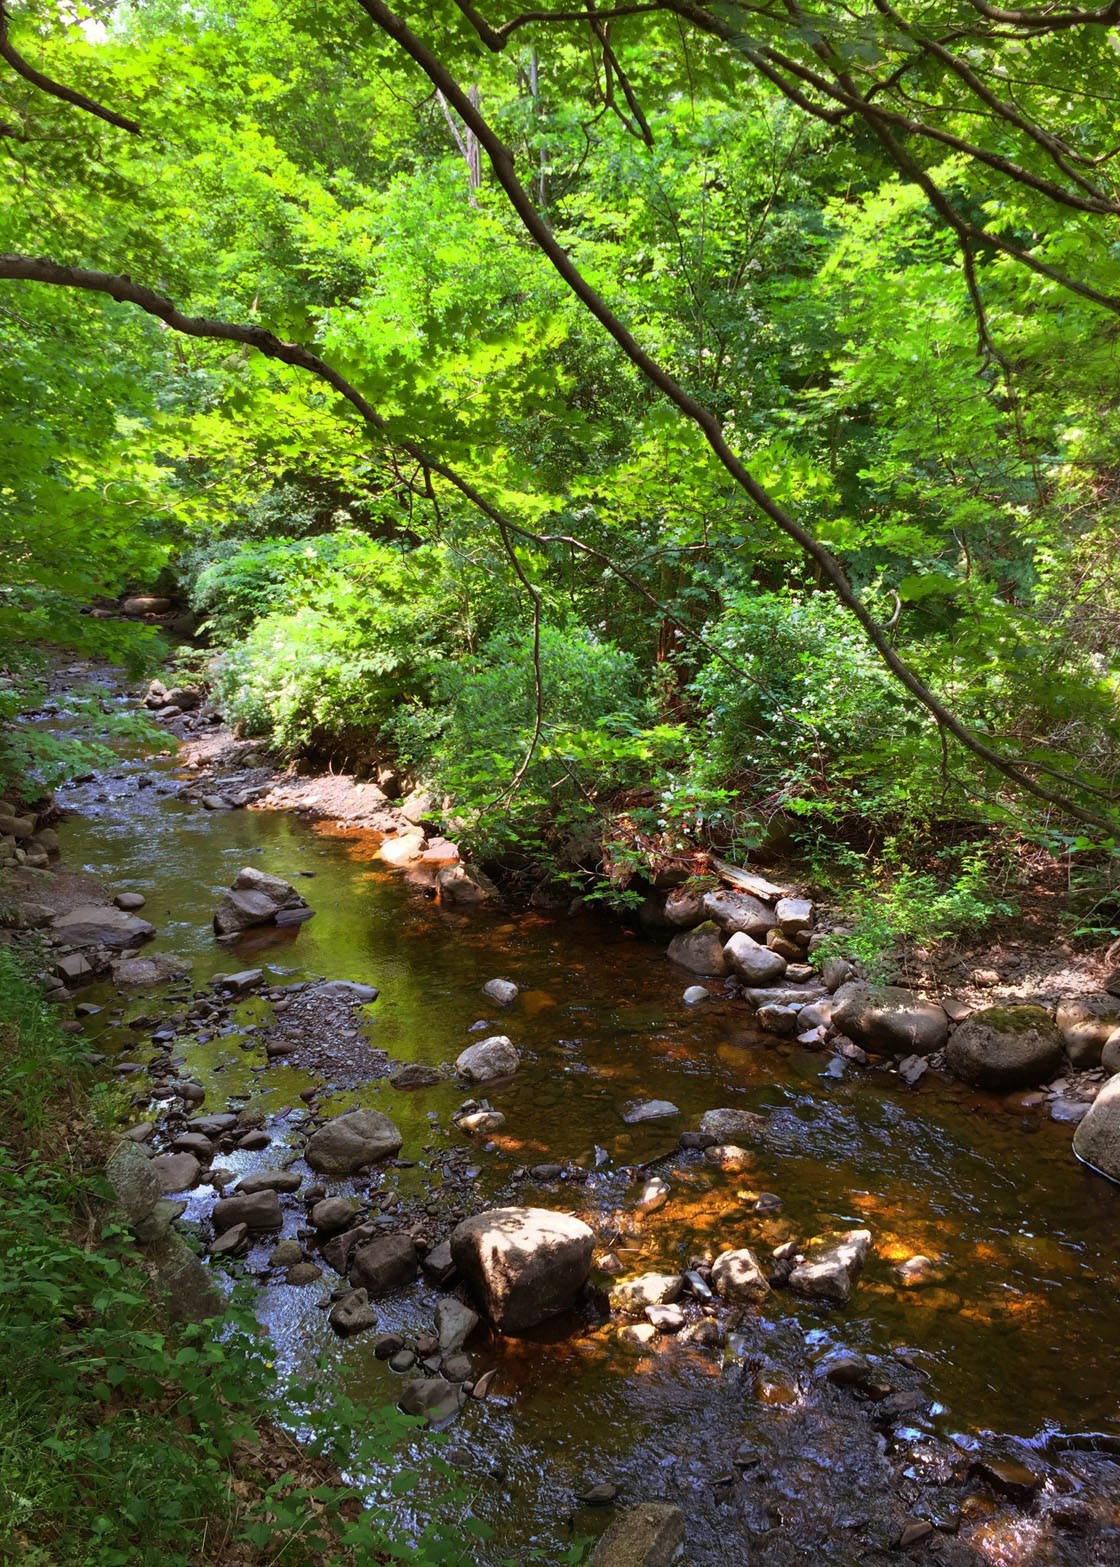
Even though the painterly effect will distort a lot of the detail, starting out with a good photo in terms of light and composition will set you on the right track for creating a great final image to hang on your wall.
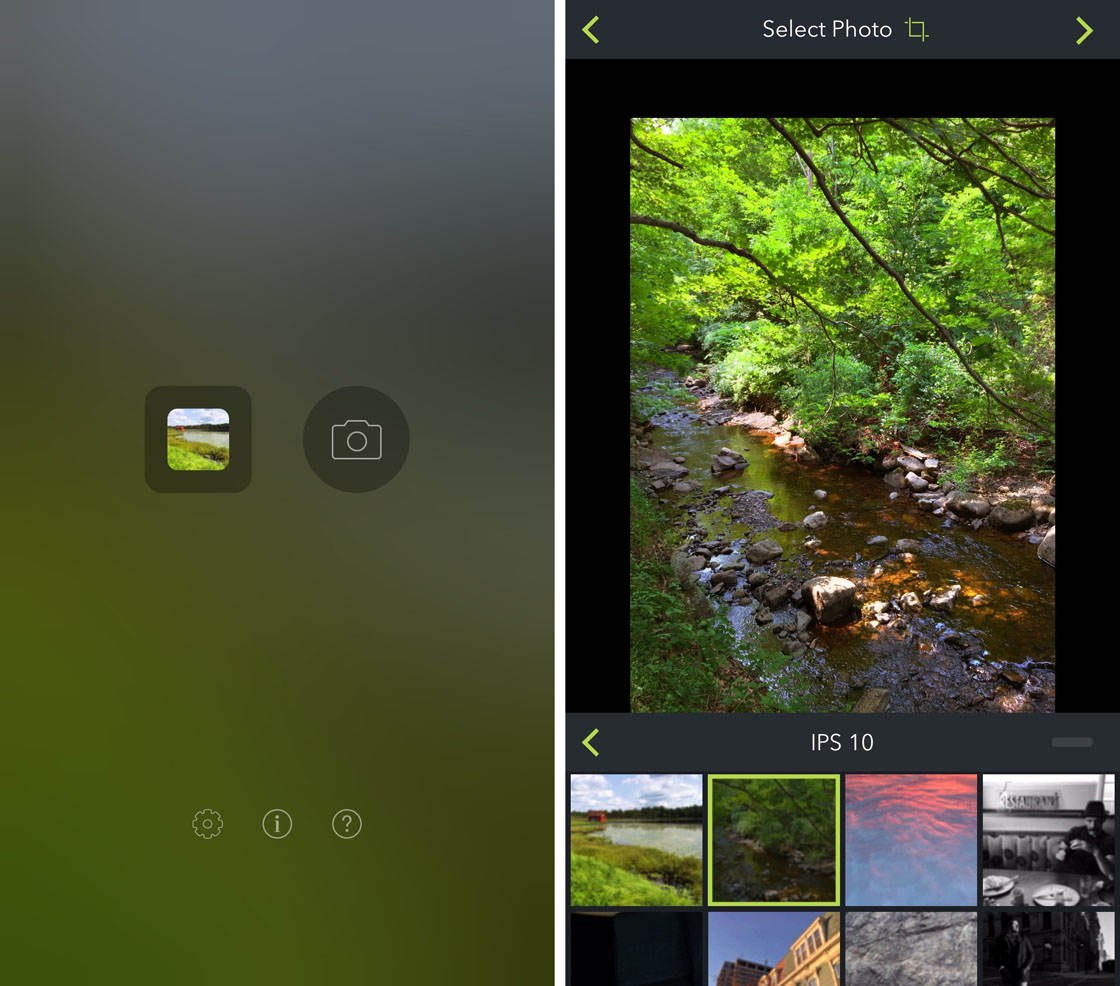
Open the Brushstroke app, then tap the icon to the left of the camera icon to access your photo library. Select the photo you want to edit, then tap the top right arrow to go to the next step.
As soon as you do this, the app starts processing the photo and shows you what it came up with. By default, the app chooses the painterly style of O1 which refers to Oil Painting Option One.
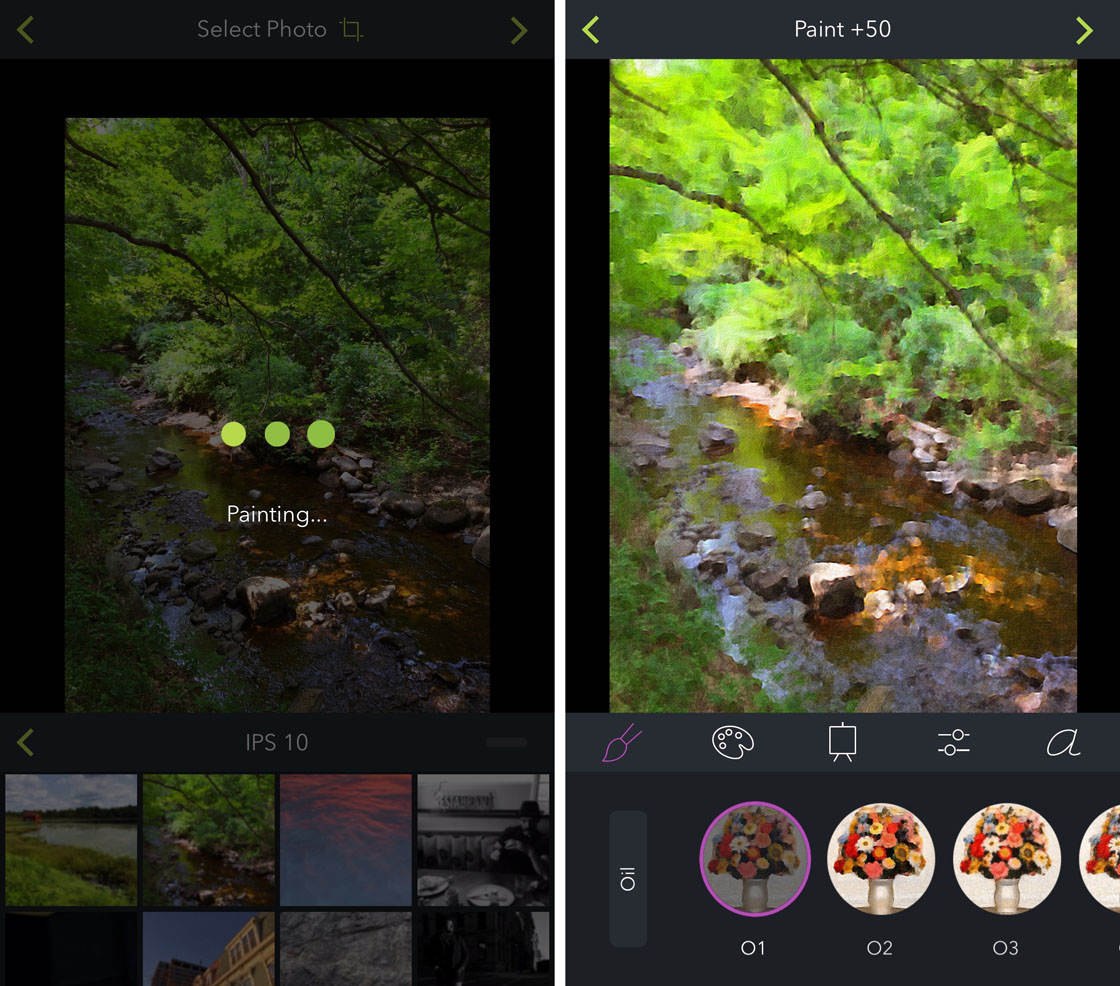
Flip through the other options, such as Washed, Medium, Natural, Hatched, etc. After choosing the paint effect that you like, tap the arrow at the top right of the screen and your painterly image is ready!
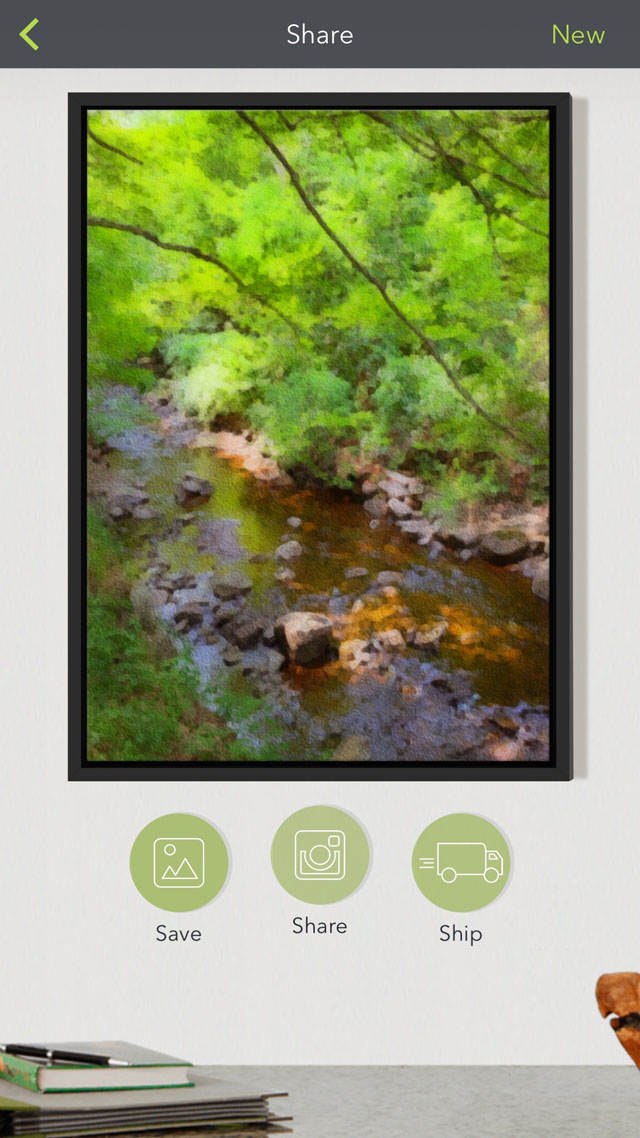
From this screen you can save the image, share it to your social media channels, and very conveniently get it printed professionally straight from the app.
Here's the final result with one of Brushstroke's painterly effects applied.
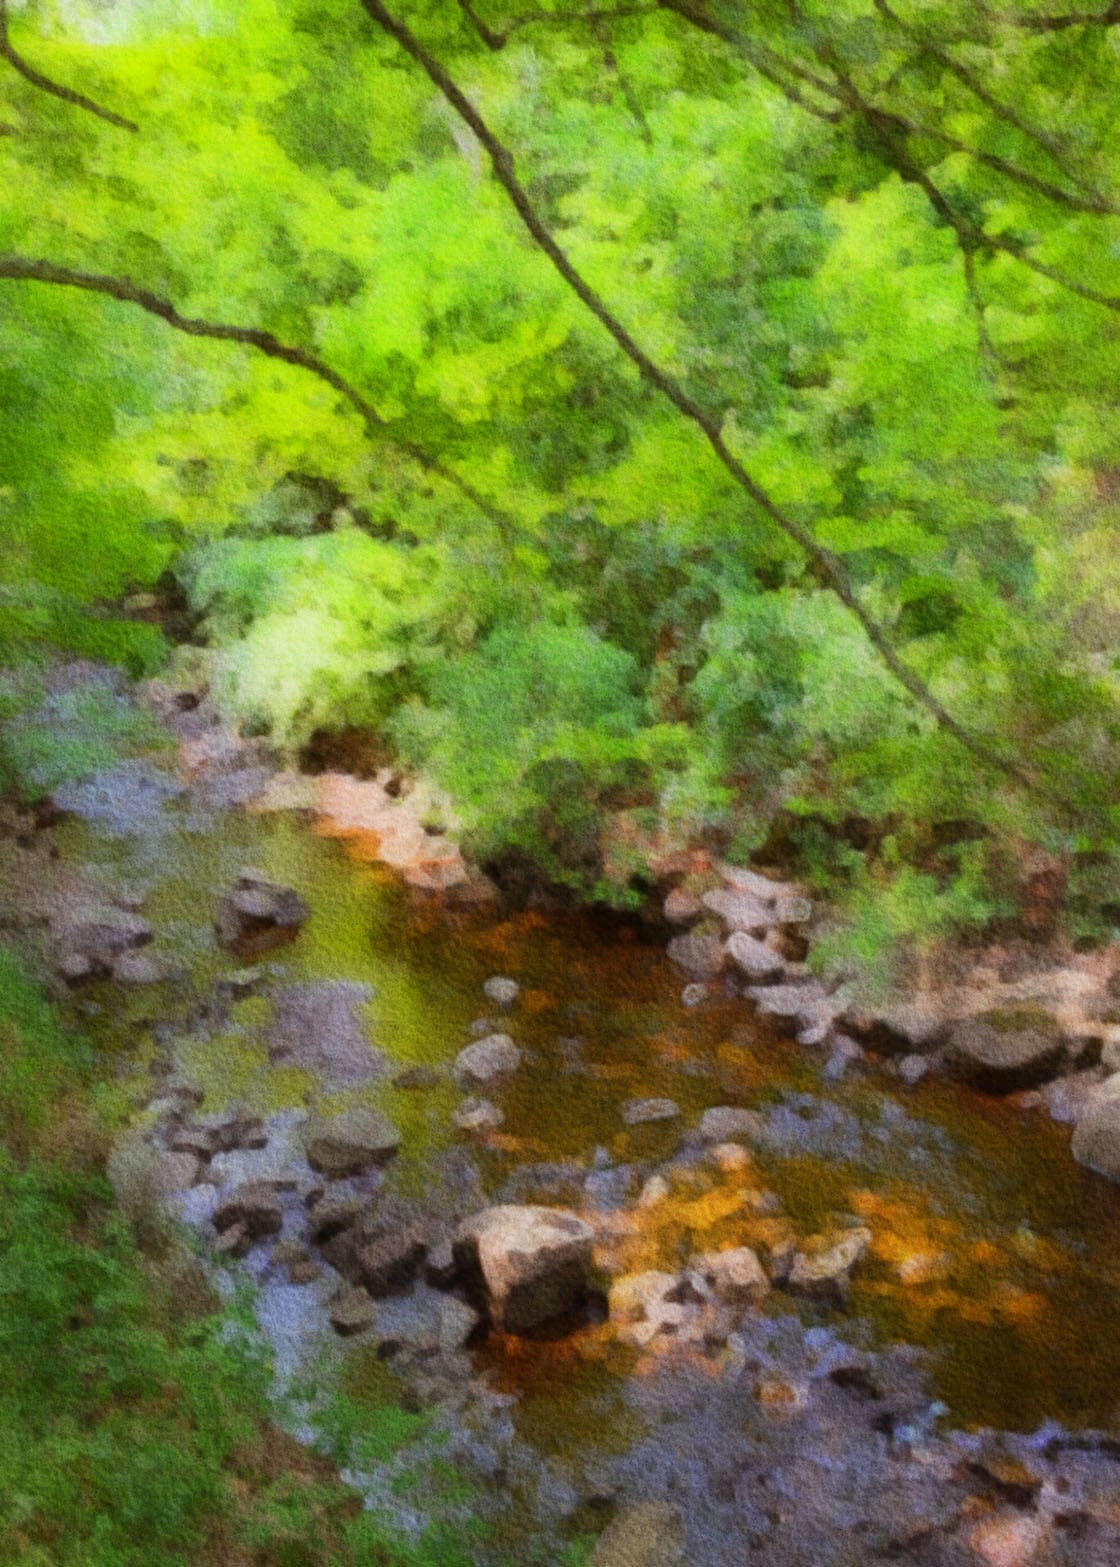
While this technique works particularly well on landscape photos, you can of course try it on other photos too.
7. Rotate A Sky Image To Create An Airplane Window Photo
This final tip is a simple and fun editing technique that will create a wonderful optical illusion.
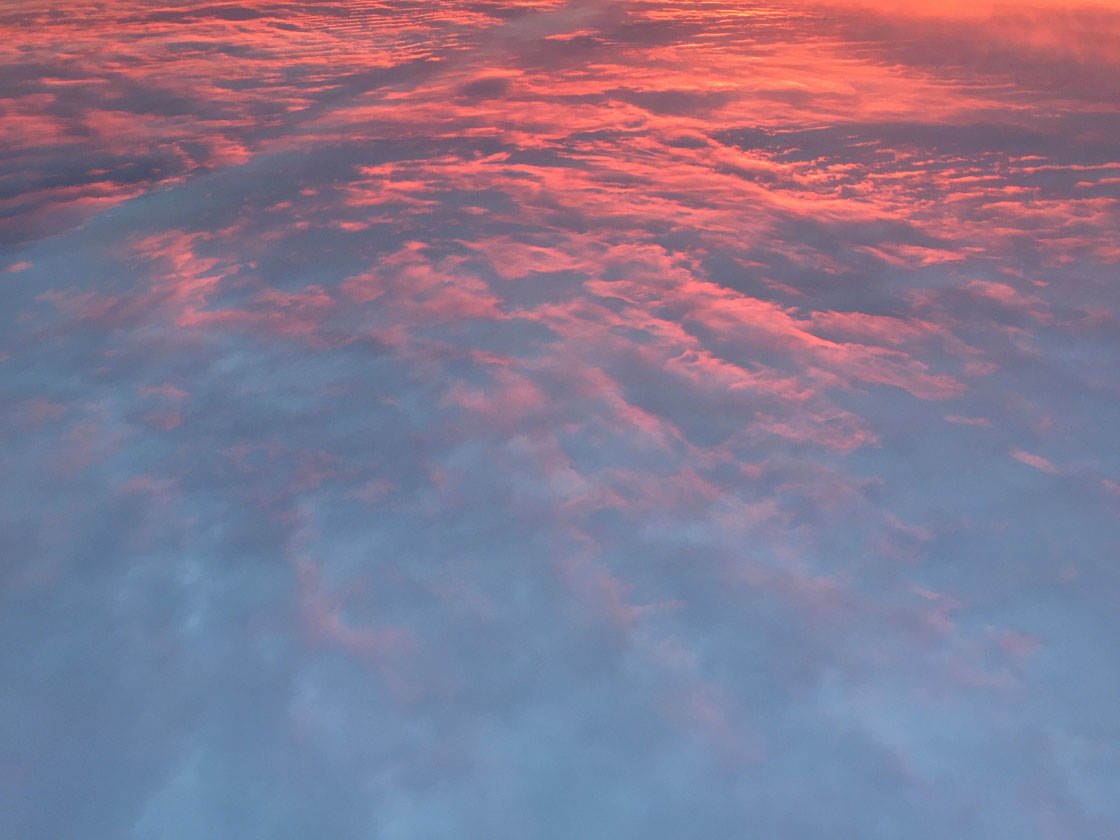
Have you ever been in an airplane when you leave behind the dull gray sky below for a beautifully lit heavenly expanse above the clouds?
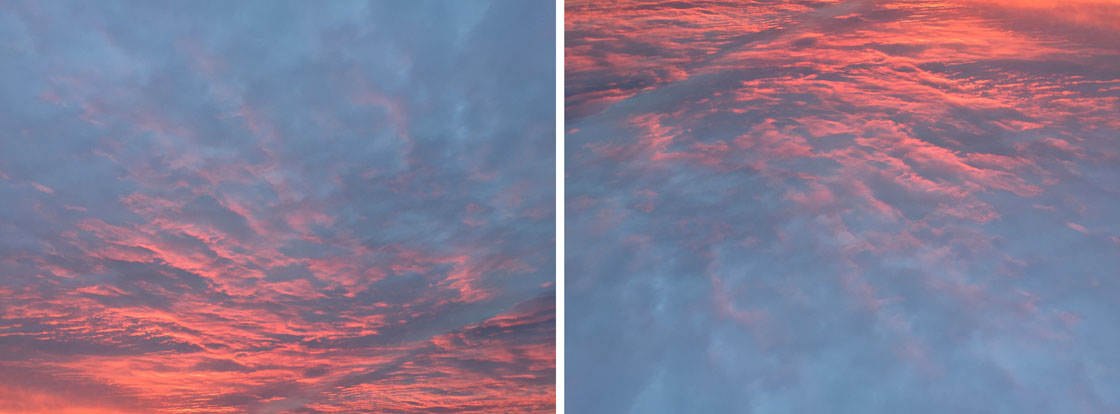
Well, you can recreate this beautiful scene far cheaper by staying on the ground! Simply wait for a lovely sunset near where you live, and then take a photo of the sky.
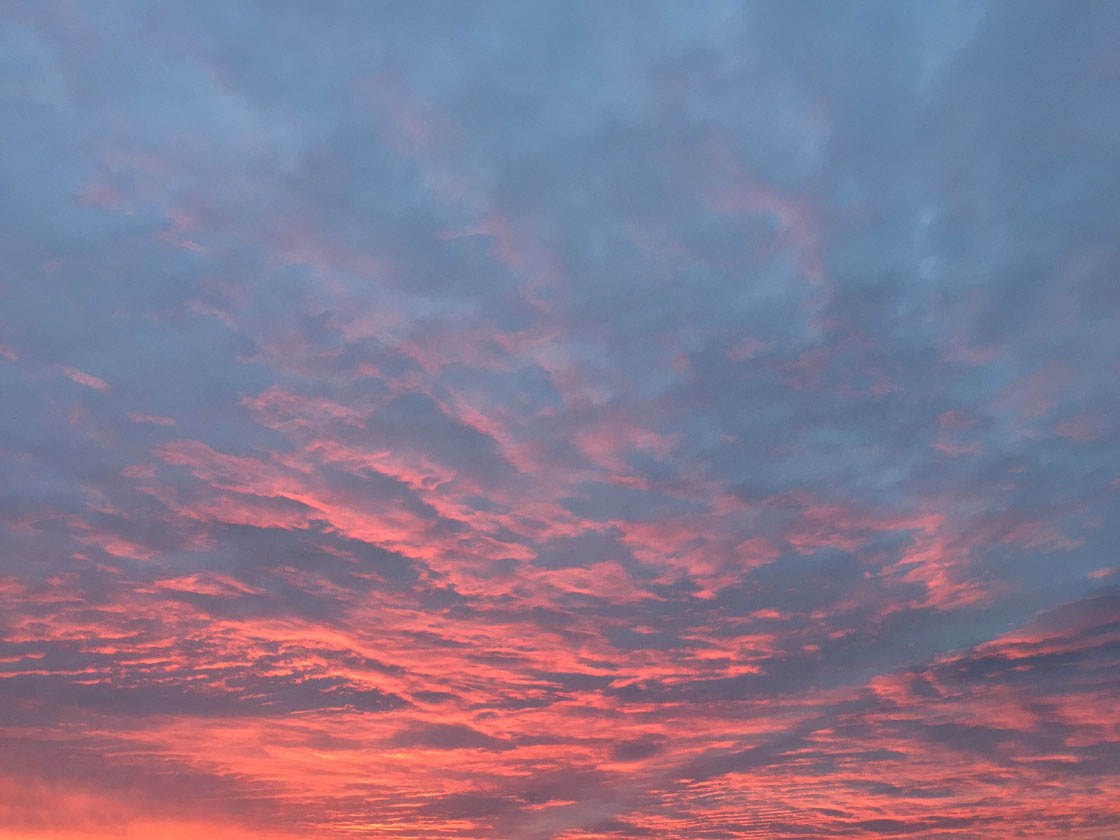
Make sure that you don't get any land, buildings or trees in the photo. You only want clouds in your shot.
The next step is to open any photo editing app that has a rotate tool. I'm using the native Photos app for this exercise.
Open your sky image, then tapEditat the top right of the screen. At the bottom left, tap the Croptool (next to the Cancel button).
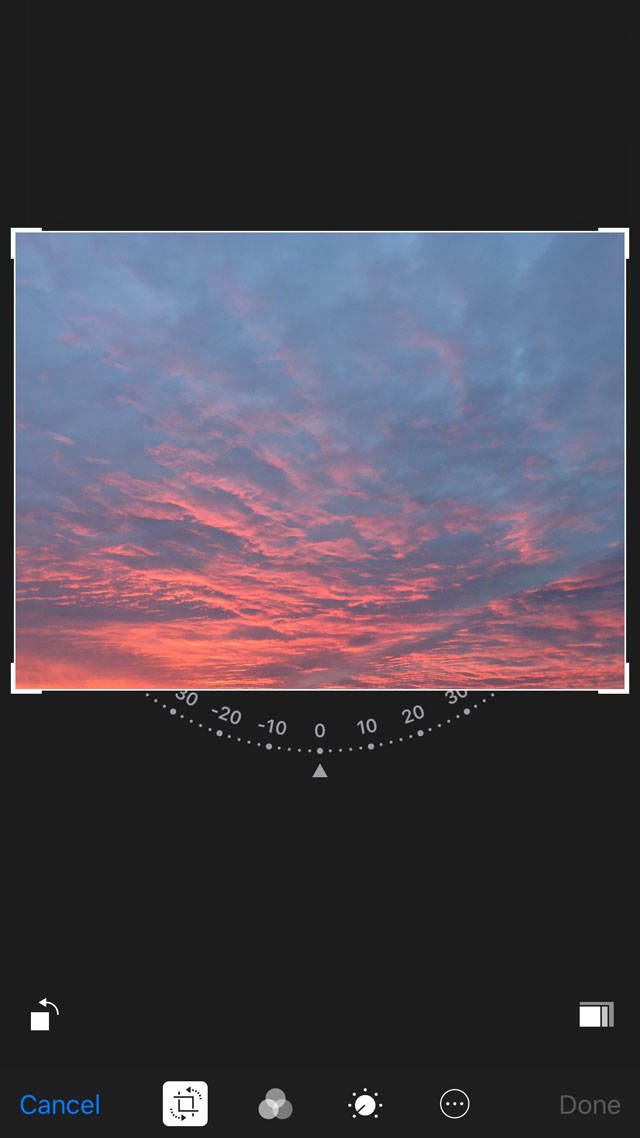
Now tap theRotatetool which is positioned directly above the Cancel button. Your image will rotate by 90 degrees.
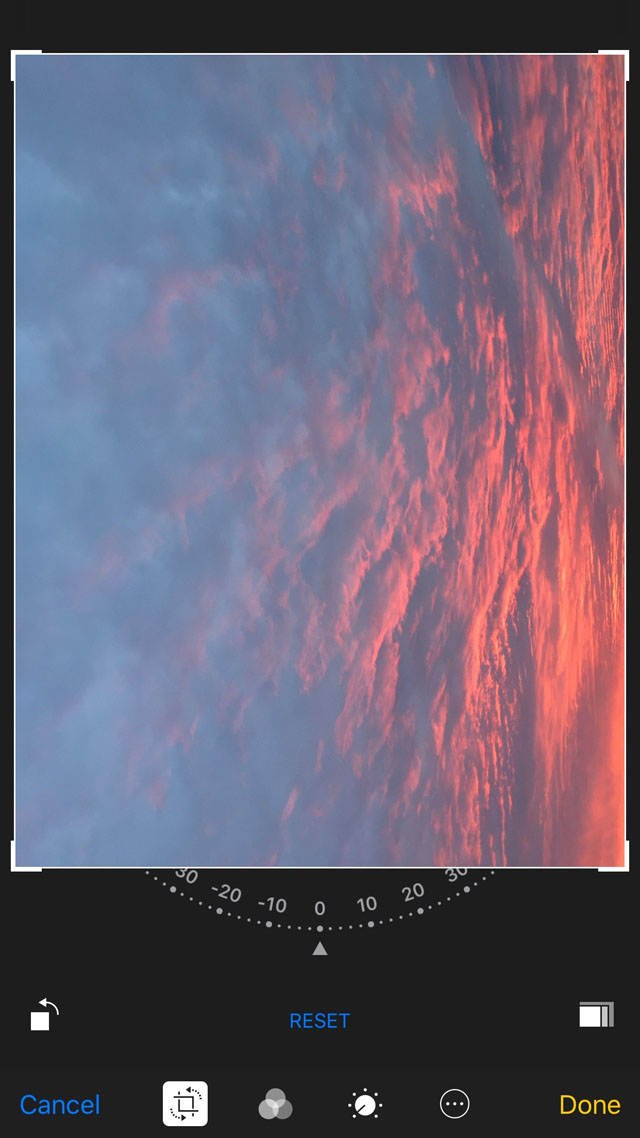
Tap the Rotatebutton again so that your image is turned upside down.
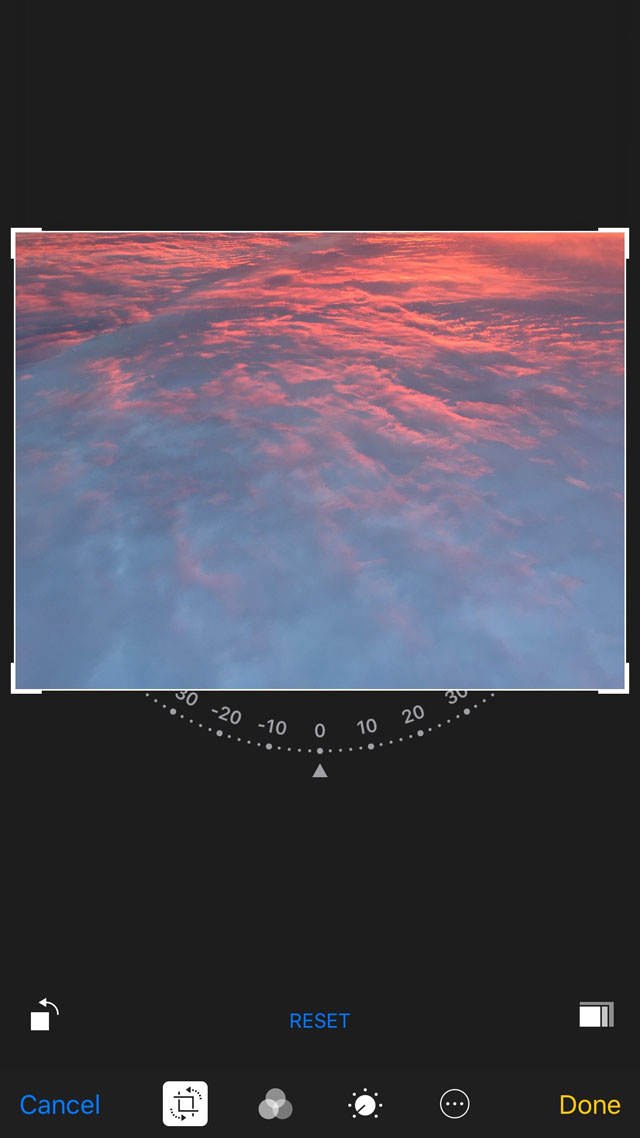
Tap Done to save the image. This simple rotation technique tricks the eye into thinking that you took the photo from an airplane as you were flying above the clouds.
How To Stretch Image On Iphone
Source: https://iphonephotographyschool.com/photo-editing-tricks/
Posted by: moorewharyince.blogspot.com
0 Response to "How To Stretch Image On Iphone"
Post a Comment